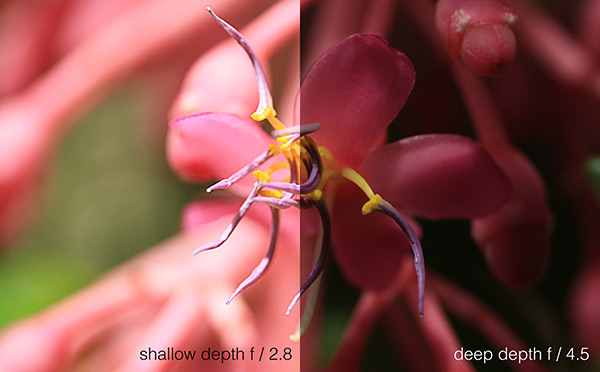
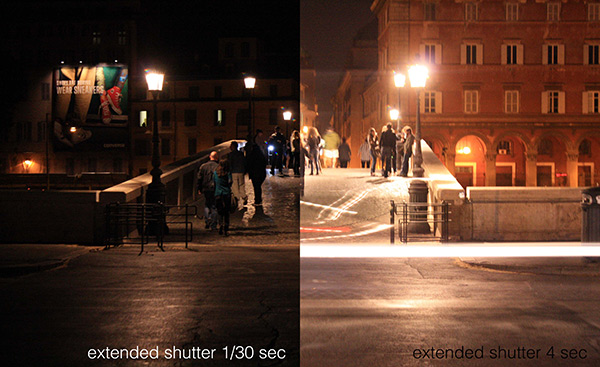
With the advent of digital cameras, photography has quickly become one of the ways that designers record their work and have fun. Most people are afraid of making the switch to manual mode, though. The following six tips are for those who are interested in gaining more from photography and understanding how it is done. 1. Understanding the exposure triangle Whether you are a beginning photographer or a seasoned pro, having an accurate understanding of the ins and outs of exposure will either make or break your photograph. The exposure triangle is composed of three main elements that you can adjust or simply leave for the auto-shooting mode to handle. ISO is the sensitivity of the camera’s sensor to light. Landscape photographers can use a range of ISO levels, from 100 to 3200. It all depends on your desired look and the available light in your scene. If your site’s lighting is low or if you want a really grainy shot, you will most likely shoot with a high ISO (i.e. 800+). If, however, you have great lighting or plan on using long shutter speeds, a low ISO setting such as 100 or 200 may be appropriate. Shutter speeds offer a variety of looks for landscape photographers. As you increase the time of your shutter speed on your camera, images begin to blur and grow brighter. Should you find yourself looking to capture a perfect, silky-smooth waterfall effect while on vacation, you would want to increase the length of time that your cameras shutter is open. Typically, anything below 1/60 begins to showcase these blurs. Say, however, you are looking to capture the fierceness of the same waterfall. Settings above 1/100 will be more appropriate.
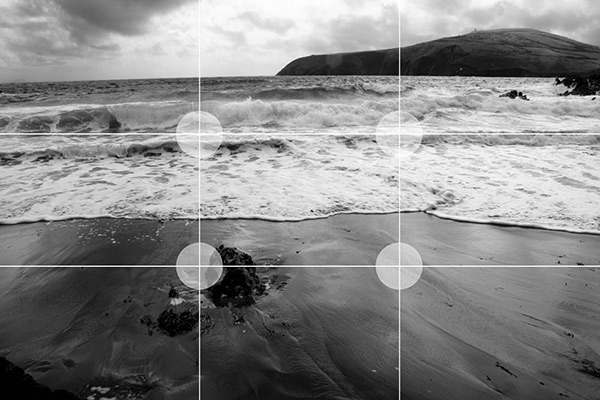
Controlling aperture is the icing on the cake, especially for macro photographers. Changing your aperture changes your depth of field. Landscape photographers who are seeking wide-angle shots often use a large depth of field. This is done by shooting above f/14. If you have found the perfect flower bud and want to blur out the background, drop your aperture setting below f/4. 2. Lighting You could say that lighting is the most important element to a photograph. We often upload our images only to find that they have blasted-out skies or darkened faces. When photographing, always know where the sun is. Face people and your back toward the sun and avoid shooting during the noon hours of the day. Look for creative ways to capture that perfect moment. Use shade from a tree or adjust the angle of your camera to the sun. Using soft light is the most popular and pleasing light for photographs. You can find this light during twilight (both morning and evening) and during the golden hours before sunset. 3. Framing Also known as composure, framing helps lead people’s eyes around the photograph and to the object you wish to highlight. Photobombing is extremely popular today, so be aware of the passerby who is looking for that opportunity to end up in your family album. Take some time and learn the rule of thirds. Imagine that your photograph is divided into vertical and horizontal thirds. The points where these lines intersect are the best spots to place your object. Placing images in the dead center often kills the image. 4. Focusing The big rule here is “if you have auto-focus, use it.” Blurry pictures make bad pictures. Unless you have practiced enough with your manual focus, don’t use it. 5. Good post-processing Many people have a bad taste for post processing today because of epic fails in Photoshop. Don’t let this deter you. Photoshop and similar software allow photographers to correct mistakes, adjust exposure, and add personal flair to a photograph. Different strokes for different folks. It never makes up for a bad photo, though. 6. Let your style shine through Above all else, have fun. Take chances and shoot the things you enjoy often. Learning from mistakes and understanding how and why you like to shoot is the most important aspect of photography. Practice these six tips and look forward to better photographs! You may also be interested in HDR and Digital Blending Courses The Lazy Photographer’s Guide to PhotoshopFeatured image: credit Jimmy Mcintyre
Published in Blog


