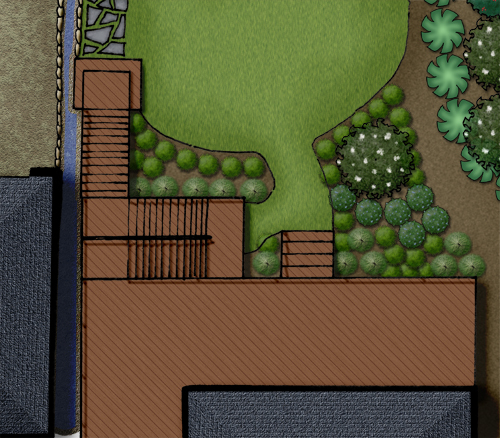
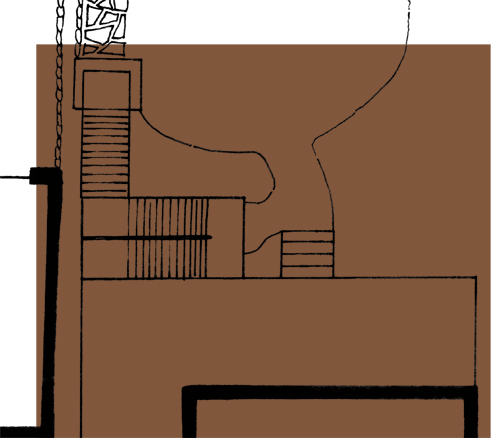
One of the things that most people can get to look pretty decent, but not great, is wood decking. Unlike wetlands its not one of those things that, when done wrong, looks like something fundamentally different, but being able to create a deck that really shines without spending a ton of time on it really can make a great touch.
Step 1:Paint Outside the Lines
This is a very familiar step, select and area larger then the deck itself. You need the extra room to allow for some of the filters to work without screwing up the edges of the deck. Next, pick a color for the decking- I went with R: 129 G: 87 B: 60. Its got a little orange to it, but its not highly saturated. This color will essentially be the mid-tone for the deck, so make it what you want the average color to be.
Then fill the large area you selected (On a new layer) with the brown color.
Step 2: Adding Grain
To get a nice wood grain for your decking boards, start off by adding noise. You want to use monochromatic to keep the noise to shades of brown, and I prefer using gaussian because it seems to give a less regular, boring look. I used 12.5% for the amount of noise, but it will vary some based on the scale of the rendering.

Next, you want to add motion blur to the grain to turn it into strips of color. You want to pick the same angle for the motion blur that you want to use for the boards- I’m using 45 degrees as it looks good, but also makes life easier when it comes to making the stripes. As for the distance of the motion blur, I used 66 pixels because it made any color stripe about 5 feet long in the plan, which gives it some good variation.

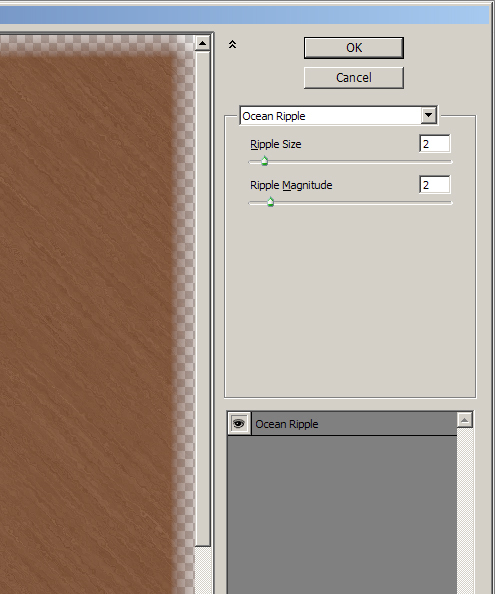
Step 3: Add Some Character
The last step for the wood grain is adding knots, imperfections, and character to the wood grain. For this I used Filters>Distort>Ocean Ripple. I went with a setting of 2 for both magnitude and size, but it, again, comes down to finding a setting that looks good based on your scale. You want to have some knots in the wood, but you still want long segments of fairly straight color.
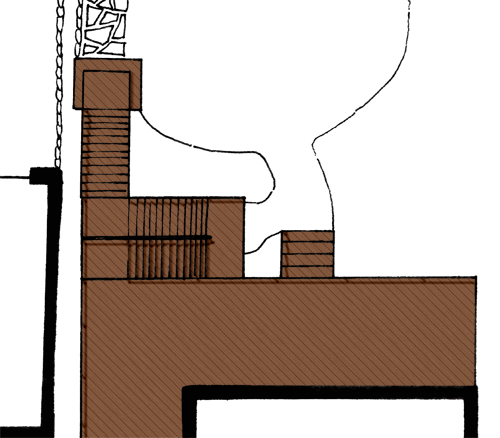
Then trim away any excess from outside, and you have your decking base.
Step 4: On The Board Walk
The first step to adding boards to your deck is to create a pattern. First, pick a color that is a darker shade of brown. The tone can be a little more red, as you are looking down through the gaps to dirt/shadow, and you don’t want the board gaps to just look like another large straight wood grain line. I went with R: 80 G: 39 B: 26.

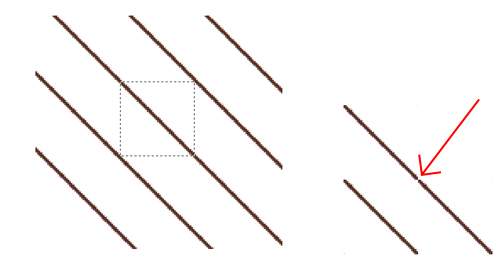
Now you want to make 45 degree angled stripes. Use the line tool, with a width of around 2 pixels. Then click the mouse to start a line, and push and hold shift- this will lock you into a line that is either 0, 45, or 90 degrees. That way you know that you have exactly a 45 degree angle. Then, draw a second line the same way. To make a pattern you will need at least 3 lines, so now merge the two layers of lines, and copy paste them. You should be able to move the new layer to the side until one of the lines perfectly overlaps one of the original lines, giving you three. If you used this alone as a pattern, the anti-aliasing would be screwed up from the double layering of one of the lines, so delete the doubled up line from the pasted layer, and you will have 3 diagonal lines (I went one step too far, and did 4 using the same method a second time).

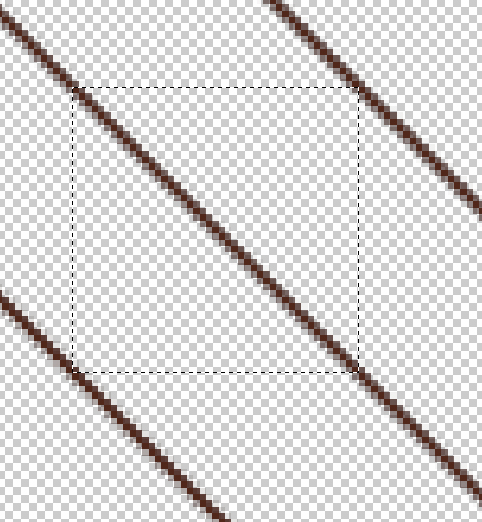
Now to select an area to make the pattern from, merge the line layers together, and turn off any other layers. Using the rectangular selection tool, click on one of the squares in the center of the middle line, and again, hold shift as you drag it down, locking it to moving at a 45 degree angle, creating a square. You might be tempted to drag it down until its just outside of the two side-lines, but that will give you a strange gap in your pattern, as the repeating tile will not have the full width of the line:
So make sure that you get part of the line, essentially all of the line other then the single pixel that is grabbed in the upper left and lower right of the selection box:
As you have before, go to Edit>Define Pattern and give the line a name, like “Decking” or something of that ilk. Its key that you have all layers other then the line turned off so you have the lines on the transparency grid, or when you paint with the pattern your wood grain will be covered. Once the pattern is made, magic wand select the area not on the deck, then invert selection, and paint the decking pattern:

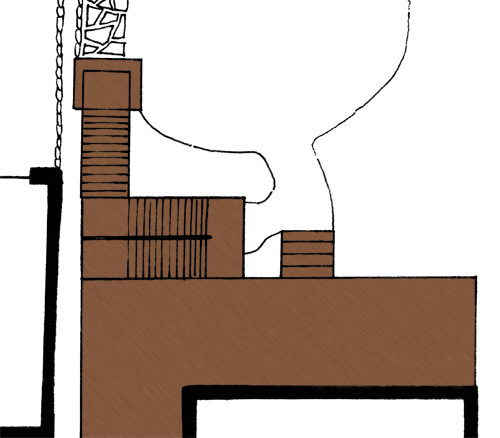
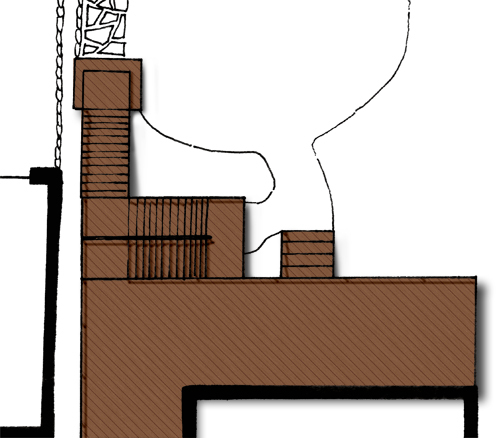
Step 5: Shading and Shadow
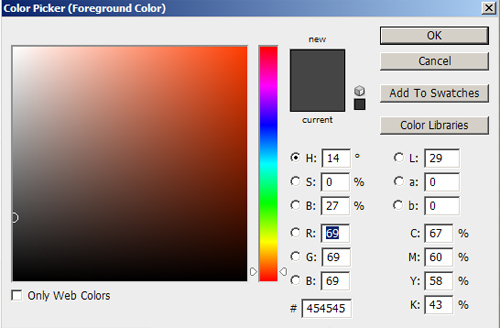
To give the decking a good three dimensional quality, you need to add shading for stairs and decking. First, pick a dark gray color, like R:69 G:69 B:69.
Then pick a brush that you will use for the railing shadows- I’m using 15 pixel, 0% hardness, 27% opacity. Turn the mode to “Linear Burn” or “Color Burn”. These both darken the color, without graying it out, like an actual shadow.
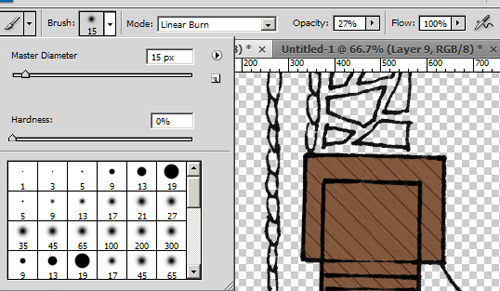
Start with any straight railings. Click the brush where you want to start a railing, push and hold shift, then click where you want the railing to end. this will give you a straight line with your brush.

Then add in any shadows that should be angled- Supports to the main railing, and for railings along stairs, the railing is at a vertical angle, so the shadow will be at an angle. The shadow will get closer to the railing as you move down the stairs, but each step will set the railing back to its original distance, so you end with a jagged look like this:

The last touch is to add shading to the decking where it would be cast from changes in elevation of the decking. Increase the size of your brush by around 2x. Now, select every other stair that will have a shadow cast on it:

Now use the same Click-Shift-Click method to paint on shadows. The trick is, run the brush so the middle of it runs along the uphill side of the selection box:
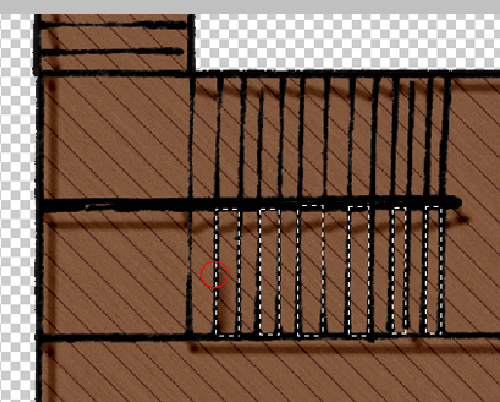
Once you do it for the selected stairs, pick the ones you skipped in the last selection and do it again.
Now, to create the shadow of the deck onto the ground, you could simply to a drop shadow to the layer. However, that will leave you with the top of the deck making as much of a shadow as a stair that steps out onto the lawn, which again breaks the three dimensional illusion. The create a shadow that has depth, first, make a standard layer drop shadow, again with linear burn as its mode (Note: you will not be able to see the shadow until you turn on a layer behind it, so turn on the white background layer):
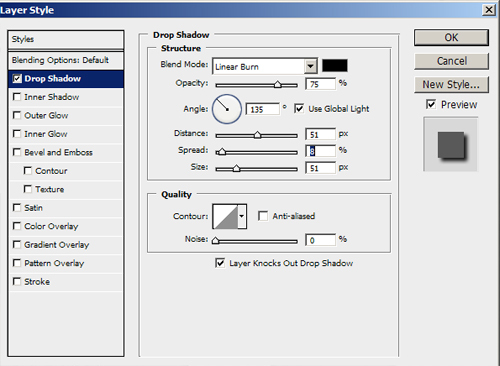
In the layer pallet, right click on the drop shadow you just made, and select “make layer”. A pop-up will ask if you really want to, and yes, you do. You will then have an editable drop shadow. Take your eraser and a nice 0% hard brush, and start deleting parts of the shadow to make the stairs angled and the low areas shorter then the tall areas:
Turn down the drop shadow layer’s opacity to around 65%, and you are all set: