10 top tips from our resident AutoCAD expert UrbanLISP to make your work in AutoCAD more efficient. When drawing by hand, we use a box of pencils, crayons, a ruler, and maybe a compass. Whatever we use, it’s all on our desk, in sight and ready to grab. AutoCAD is stuffed with functionalities hidden in menus, on palettes, and behind shortkeys. In order to get the most out of AutoCAD, we list the 10 must do’s to become a professional AutoCAD user: 1. Layers, layers, layers Without a doubt, one of the most important aspects in a drawing is the use of layers. An empty drawing by default only has one layer, named “0” in AutoCAD. Don’t use this layer unless you know what you are doing; it behaves in a particular way. It’s hard to create too many layers, but to prevent getting lost, it’s wise to think of a layer structure first. Add numbers for main categories as a prefix of the layer names so they are grouped together in the layer menu by default. As suffix, it’s good to add a code related to the type of object it’s used for; -b for layers that are boundaries, -h for layers with hatches, -t for layers with only text. You’ll get layers like 012-grass-b and 012-grass-h.
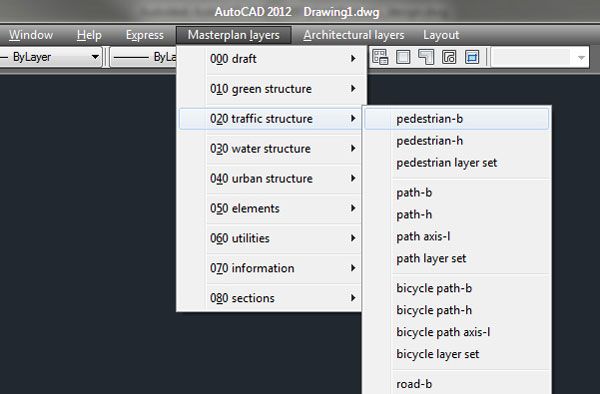
Layer pulldown menu
Use blocks whenever you can. In essence, they are little drawings on their own and usually represent something iconic, like a tree or a car. They can help to make quick changes to your drawing or quantify your drawing.
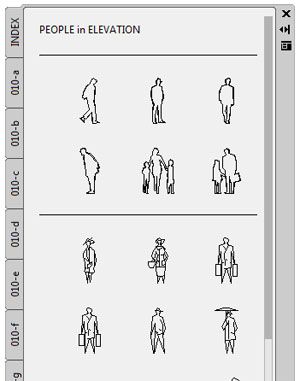
Blocks on toolpalette
Remember
layer “0” in the previous pointer? When used inside a block, the entities on that layer will adopt the layer, color, etc. of the layer on which the block is placed. So blocks are more flexible than you might think, especially when you make them dynamic. But that would be an article of its own. When you create a block, there are a few things to keep in mind: Pick the insertion point carefully, mind the rotation, set the units, and think of a proper name.
3. Customize Although AutoCAD is already packed with functionalities, customizations are essential to optimize your workflow. You’ll be surprised by what you can customize. The two images above show good examples; layers can be imported through a pull-down menu and blocks can be inserted through a tool palette. One of the easiest of customizations is the addition of hatch patterns. Google “AutoCAD hatch patterns” and look for hatch patterns you like. Download the .pat files and place them in a folder. Add the path of that folder to the “Support File Search Path” in AutoCAD’s option menu at the “Files” tab.
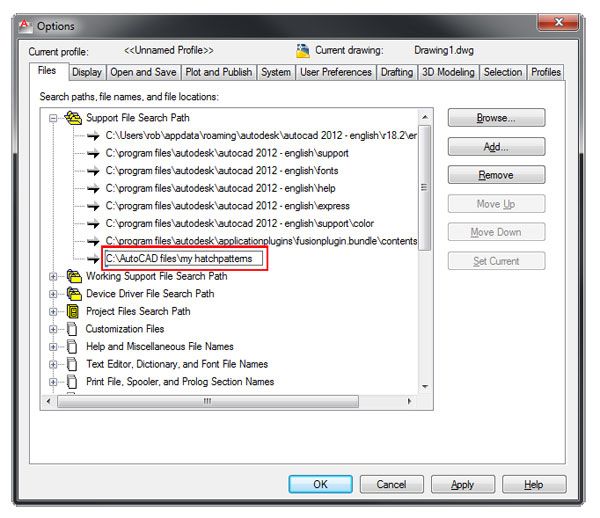
Hatch patterns_add path
When you open the hatch dialog box and select the Custom tab of the hatch pattern overview, you will see all the hatch patterns you collected in that folder, ready to be used. If that inspired you, you can take it even a step further: Take one of those .pat files and open it in Notepad. If you’re able to wrap your head around it, you’ll become a hatch master.

Hatch patterns_custom
OK, so we covered layers, blocks, and hatch patterns. Time to organize them. Before layers can be added to a drop-down menu and blocks to a tool palette, you need to create and collect them. Every time you create a CAD drawing and you’re happy with the graphics, use those layers for the next drawing. A few projects further down the road will help you to fine tune those layers. When you reach that point, you can consider adding them to a drop-down menu. There are plenty of websites with
free AutoCAD blocks for trees, cars, etc. Every time you find nice blocks, save them somewhere in a separate file. Over time, that file will fill up and become a valuable resource. To make them easily addable to your drawing, you can put them on the tool palette as shown in pointer 2.
5. Design center In an office with several AutoCAD users, it’s good to lay down an office standard and invest some time in drop-down menus and tool palettes. It definitely pays off. If you are a student or self employed, all these fancy tricks may be a step too far. There’s an easy work around – Design Center. With a design center, you can navigate to any drawing and add blocks and layers from it without having to open the drawing. So collect all the layers you’ve set up and blocks you’ve collected, put them in one source drawing, and you will have created yourself a library. Don’t forget to back up that file, though!
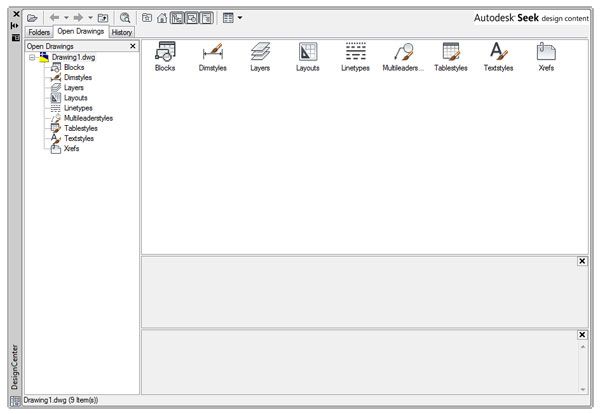
Design Center
When doing everything mentioned above, your drawings should become well structured and organized. To keep them structured and organized, it’s good to remove unused elements from your drawing. Your drawing is basically a graphical representation of a database. If you removed a block from your model space, it doesn’t mean it’s out of the database. With purge, you can remove blocks, layers, text styles, etc. that are not used in the drawing from the database. You’ll see when you run it a few times that you can keep on purging. Overkill is a useful command to remove duplicate entities. You can try it by opening a drawing, drawing a rectangle, copying it, and placing it exactly on top of the other rectangle. After running overkill, there’s only one left.
7. Close the ribbon, use your keyboard After AutoCAD became a
commercial product in 1982, it was further developed and changed drastically. These changes not only defined particular generations of AutoCAD, but also particular generations of users. Early users relate lineweights to colors. In the first decade of this millennium, 3d became a focal point of Autodesk, and in AutoCAD 2009 the ribbon was introduced following the changes Microsoft made to the interface of their “Office” suite. Why Autodesk introduced this interface is subject to debate, because every professional user of AutoCAD can confirm — use your keyboard! Think about it: A ribbon in “Word” or “Excel” makes sense. With these programs, you enter text and data with your keyboard. It would conflict with keyboard commands. AutoCAD is the opposite; you click positions in your drawing and select entities with your mouse.

Ribbon
Going back and forth with your mouse to click icons is just a waste of time. Besides that, ribbons and toolbars take up space. Unlike with a Word document, you want as big a surface as possible on your screen for your drawing in order to have the best overview.
Acadpgp
You’ll need to learn a lot of key combinations, but you will get used to it quickly. There’s a good way to learn it; every time you use a particular command several times in a short amount of time, look up the shortkey combination. For instance,
M for Move, F for Fillet, H for Hatch. Makes sense, doesn’t it? Or dimensioning commands:
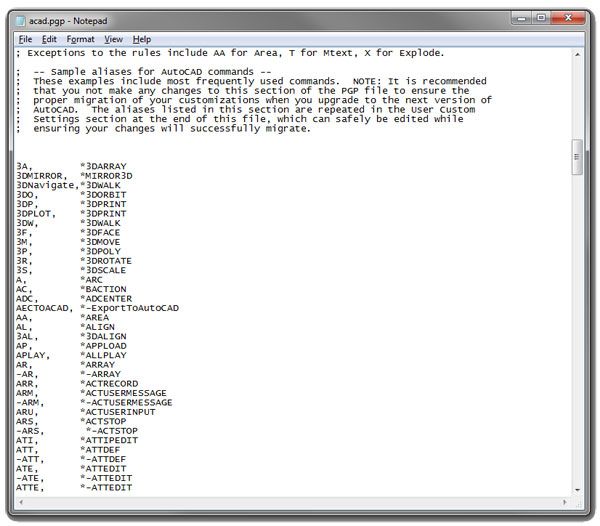
DLI for Dimension Linear, DAL for Dimension Aligned, DRA for Dimension Radius. Do you see the pattern? Of course, this is also customizable. Find the file called acad.pgp (usually at C:Program FilesAutodeskAutoCAD 20XXUserDataCacheen-usSupport) and open it in Notepad. Here you can define some basic shortcuts for basic AutoCAD commands. And don’t forget about key combinations with ctrl and alt. We all know ctrl+C and ctrl+V; with alt you can navigate through the drop-down menus. And this is also customizable!
8. Add apps Just about any action in AutoCAD can be automated. Using the keyboard rather than the ribbon will speed up your workflow. But it’s nothing compared to using apps. In case you missed them, you can find some
demonstrations of apps for AutoCAD here on landarchs that can be downloaded at
urbanlisp.com. UrbanLISP apps, or commands, follow a similar strategy for shortcut key combinations as the dimensioning layers in the previous pointer, so they are easy to remember.
See these AutoCAD tutorials:
9. Snap and select like a pro There are two main purposes for the mouse in AutoCAD: defining positions and selecting objects. If you want to draw accurately, snapping to the right point is extremely important. It sounds obvious, but it deserves some attention. The more objects in your drawing, the more snapping points you’ll have. If there are a few snapping points close to each other, the chance of snapping to the wrong point increases:

Snap perpendicular

Snap intersection

Snap endpoint
If you want to have some more certainty that you snapped to the right point, you can type the snap point you need. Before clicking, type the first three letters of the snap you need. In the example of the images, it’s
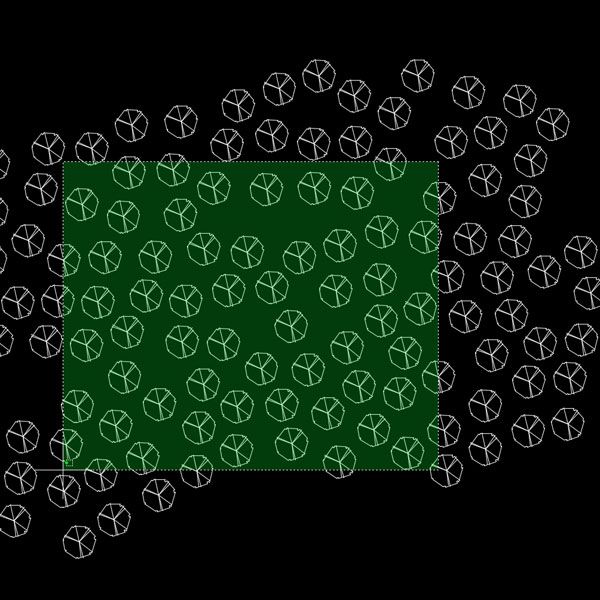
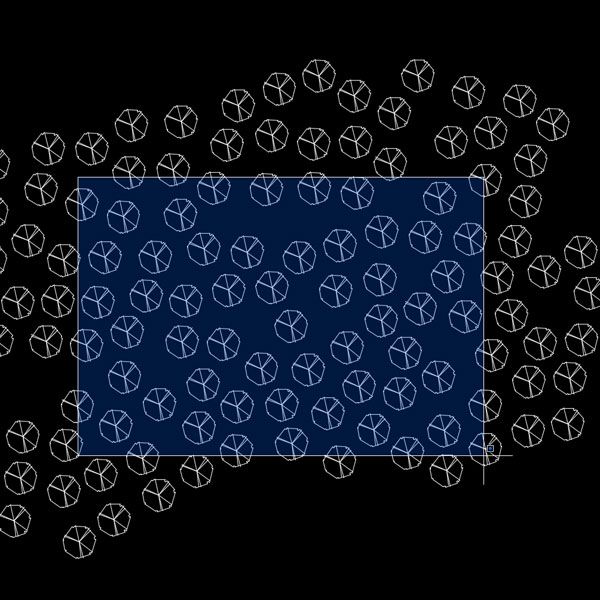
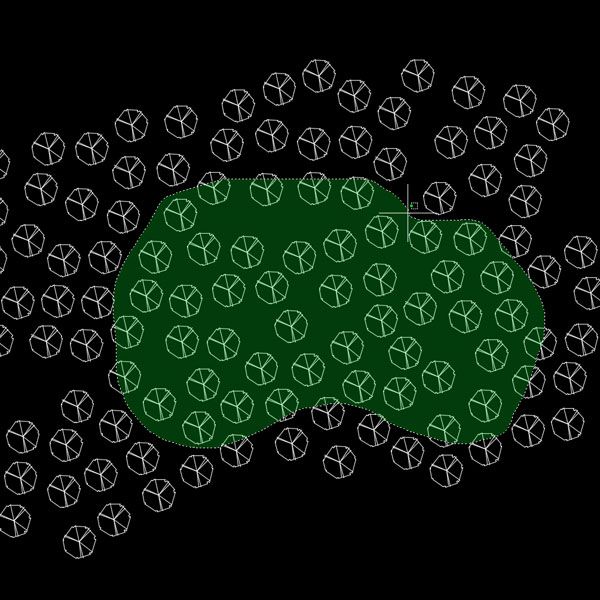
PER for perpendicular, INT for intersection and END for endpoint. It will temporarily disable any other snapping option. When you need to select multiple entities, there are also several ways to create a selection. Two basic methods are the crossing and window selection. When you click and move your mouse to the left, you’ll get a green field with a dashed white edge. This means you select everything touching the green field. Moving your mouse to the right will create a blue field with a white outline. This will select everything completely within the white outline.
Selection crossing
Selection_window
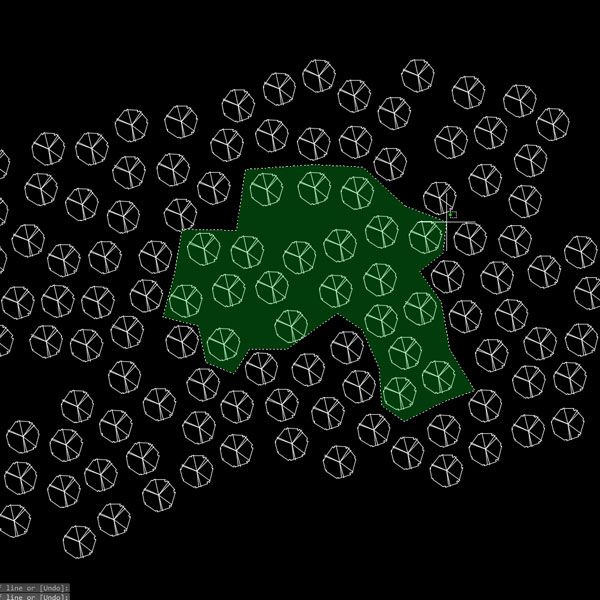
Most regular users know this. There are several other methods, however. When you are about to create a selection, you can enter, for instance,
CP (crossing polygon). This will allow you to create a polygonal shape with a green field. Anything touching the green field will be selected.
WP (window polygon) will do the same, but will only select everything within the blue outline.
Selection_crossing polygon
In the most recent versions of AutoCAD, you can even apply these methods just by dragging your mouse!
Selection_dragging
By typing an
F (fence) you can create a line and everything touching it will be selected.
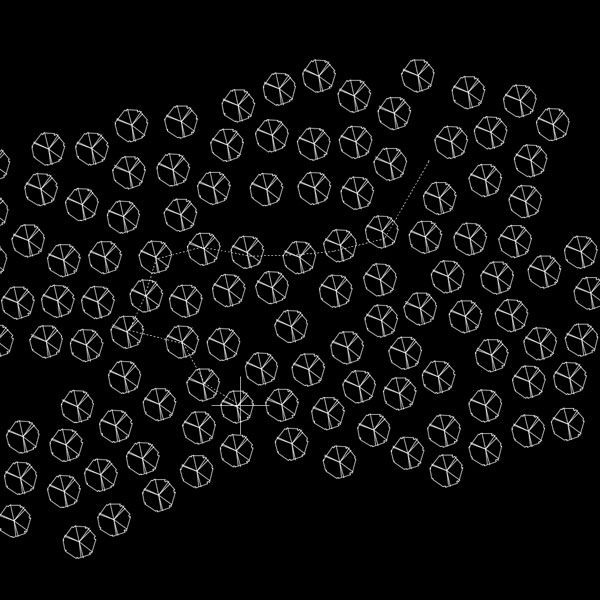
Selection_fence
Click here for a full overview of
selection methods.
10. Be consistent Consistency is crucial. If you created a system for naming layers, stick to that system. Don’t introduce another for that project. Create blocks in similar ways so they are easy to exchange. Stick to a system that makes sense when you customize shortkey combinations for commands. Create a system in naming your files and organizing your folder and stick to it! Of course, systems can change and be developed. Introduce changes in a new project. –
These pointers are focused on AutoCAD. However, most apply to virtually any CAD program. Sometimes the terms are different: In SketchUp, blocks are called components; in Illustrator,they’re called symbols. For AutoCAD, you can use .fas files as apps. For SketchUp, they’re called rubies (.rb) and for Illustrator, they end with the extension .aip. So optimize your workflow and become a pro!
Recommended Reading:
Article by Rob Koningen
You can see more of Rob’s work at UrbanLISP
Return to Homepage
Published in Blog