


Landscape Architecture for Landscape Architects › Forums › TECHNOLOGY › How To: Planting Plan Tricks?
- This topic has 1 reply, 13 voices, and was last updated 12 years, 7 months ago by
 brian matthew walker.
-
AuthorPosts
-
June 27, 2013 at 2:36 pm #154631
 brian matthew walkerParticipant
Hello all,
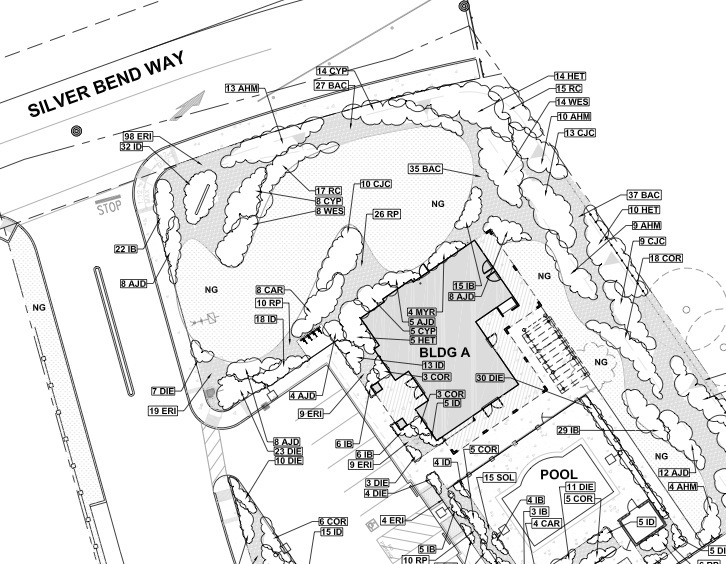
I was wandering if there is an easier way to place plants in a given (irregular) area, and have them spaced evenly apart. For example i have a given plant material that needs to be 15″ on center. I usually set an array path and let it follow each outside edge but this still is imperfect and requires alot of adjusting to get the plants lined up correctly. If anyone has any tricks let me know it would help me out a ton. Thanks
June 27, 2013 at 3:04 pm #154651brian matthew walkerParticipantI do see how this in “real life” scenarios makes sense. I ask for organization purposes. I am new to the profession. (2 weeks in) and was just wondering if there is a faster and efficient way to do this. But I do understand your point. Thank you!
June 27, 2013 at 6:26 pm #154650 Andrew SpieringParticipant
Hi Matthew,
Great question! Assuming you are using AutoCAD? I primarily used the array command to layout plant material. Another tool to consider is the measure command (me) which allows you to set blocks along any line. Check out the tutorial below (measure command starts around 4:30):
If you are trying to fill an area with plants, then you just offset each line based on your spacing, then run the measure command on each. If you are on AutoCAD, I recommend using Land F/X. They have an amazing tool that takes the hassle out of creating planting plans. Two other great solutions are Dynascape and Vectorworks.
Also, you can move so much faster with hotkeys than pointing and clicking tools on the ribbon. You may also want to check out this discussion – there are some great tips shared related to planting.
Hope this helps!
June 27, 2013 at 6:44 pm #154649 JefferyParticipant
Brian,
What scale will you be plotting at?
June 27, 2013 at 7:00 pm #154648 Chris LazarekParticipant
Buy LandFX
June 27, 2013 at 7:17 pm #154647 Paul DeeringParticipant
Brian, I’ve been using the “cloud” function in AutoCAD for years to outline a plant grouping, and then taking the area that AutoCAD will give you for that cloud, divide by the square of the plant spacing for that particular type of plant and label the “cloud” with the plant abbreviation and quantity. I started this in frustration with groundcover spacing that is not definitive enough about actual quantities (how far from edge to start etc.). This method also means you call for enough plants – I think people get tired of clicking in every plant individually which I suspect is the cause of those landscapes with plants sprinkled around sparsely.
 June 27, 2013 at 8:02 pm #154646
 Jeremiah FarmerParticipant
I’ve only seen a couple of vaguely usable techniques.
One was to place the Cross hatch in the area, then explode the hatch and use the intersections as snap points for the blocks.
The other was to offset the polyline inward, and use those concentric polylines with the Measure command.
But both of these run the risk of wildly overlapping plants — the former at the edges, and the latter in the interior.
When you say it requires a lot of adjusting, you’re not kidding. But you’re using the equivalent of millions, if not billions, of lines of code, perceiving geometric shapes and their relative distances to each other. It’s a bit of a challenge to translate that into computer code. The only way a computer could approximate that, would be to keep “nudging” individual symbols, attempting to minimize the wasted space. The end result might look fantastic, but it might well sit there chugging for many minutes for a fairly typically shaped area.
I’ve been experimenting with something that is a little of both — basically, give the user a control panel to more easily adjust them, taking ownership of that “nudging” process. Or as I’ve been thinking of it, similar to shaking an irregular piece of tupperware filled with marbles.
–J
June 27, 2013 at 10:21 pm #154645brian matthew walkerParticipantI started messing around with the path array command and found that you can control pretty accurately the spacing of plants. You can also tell it how many rows you want and everything. You can also hover over it when the command is done and add/ subtract plants in a row. And change the spacing. It’s pretty cool. Still need to check out land F/x! Hear alot of great things about it.
June 27, 2013 at 11:46 pm #154644 Andrew Garulay, RLAParticipant
There are lots of ways and it depends if you want to be rigidly accurate or not, and how big the area is. I often have to do mitigation planting plans with a requires x’ o.c. If they are little areas, I’ll sometimes draw the plant symbol to equal that spacing (ie., 3′ in diameter for 3′ O.C.), then I just copy them so that they are just barely touching.
In a bigger area, I will sometimes use the measure command and shoot the symbol along a line at the proper spacing. Then copy that row of symbols off centering each row – you can eyeball it or you could throw down offset lines at the proper distance … then erase any outside of the area that you are trying to fill. It really takes little time.
June 28, 2013 at 6:30 pm #154643John Woods
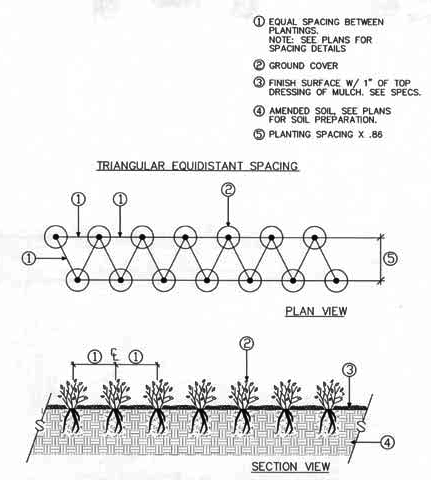
Participantprovide the contractor with the limits of the plant via hatch pattern and give the size, condition and spacing of the plant. let them quantify the plants. i have been doing this and it has worked well. we also have a spacing chart (detail) that they have to use to provide the correct triangular spacing and correct offset from edges of paving and other beds.
June 28, 2013 at 6:44 pm #154642Andrew SpieringParticipantGlad to hear someone else is using hatch patterns to represent planting areas. Though, I typically still use symbols for large shrubs and trees, hatches are a “clean” way to represent plant massing. Regarding the detail, is this similar to the one you use?
 June 28, 2013 at 6:45 pm #154641Andrew SpieringParticipant
Paul, Thanks for sharing the example! Awesome to see how others do it… 🙂
July 2, 2013 at 8:07 pm #154640Jeremiah FarmerParticipantJohn,
The trend in the industry is towards more information, more accurate quantities, realtime cost take-offs, you name it. Firms are demanding it, clients are insisting on it. To tell a client you have no idea what the quantities are, and that they need to ask the contractor, inevitably means you will be value-engineering the project. I just got off the phone with a firm who is working on assimilating all of the design information from several different softwares, into an ability for a project manager to make advanced cost estimation decisions. That sort of bleeding-edge capability just screams of the future to me.
But let’s also not forget the classic reason to have accurate quantities for every plant massing — that’s so the contractor knows how many plants go in that one area, and then it lets you know how many plants are *supposed* to be in that area, as well as the client. That formula from your spacing chart can be integrated into a toolbar button for labeling, and guarantee accurate plans. Labeling planting plans is no different than dimensioning details, it’s all part of accurate and complete construction documentation.
–J
July 2, 2013 at 10:20 pm #154639 Jason T. RadiceParticipant
Depending on the size of the plan, I have different techniques. Like others have stated, if the plan is at a small scale and so are the plants, use a hatch pattern to indicate plant typw. Include a detail of how you want them planted (staggard or lined up), and let the contractor figure it out based on area. For larger plants or at a much larger scale, I create a highly visible scrap layer in CAD, select a perimeter, and use the dot-hatch at the appropriate scale. You can also choose the origin of the hatch, so it makes it easy to align or center the hatch. Explode the hatch and then place the planting symbol block with the center on the dot. Go back and turn off the planting layer or isolate the hatch, select and delete, or you can turn it off and freeze it.
July 6, 2013 at 1:53 am #154638 Paul BuchananParticipant
I agree with John. This is how we do it too. The Legend shows the hatch, the plant it represents, spacing, and container size. Develop the spacing chart detail and your done. If there is a special condition, draw a detail of that condition.
-
AuthorPosts


- You must be logged in to reply to this topic.