Top 10 Autodesk Revit Basics in Easy to Follow Youtube tutorials to help get you off to the best start. Jumping into new software can often be intimidating. Autodesk Revit certainly has its challenges for landscape architects, but it is ultimately highly rewarding and can significantly increase productivity. Revit is still relatively unused, especially in small offices. However, it is slowly becoming more and more popular. It can provide much more information than an AutioCAD drawing, with the luxury of having plans, sections, and visualizations all located in one file. In the near future, we may see more of a transition from AutoCAD to Revit as the popularity of BIM increases. BIM is undoubtedly the future for landscape architecture, and Autodesk Revit is one of the leading forms of BIM that every landscape architect should understand. Unfortunately, it is not specifically tailored to landscape architecture, but design intentions can still be perfectly achieved and communicated. These Top 10 basics will make the first few Revit sessions much more manageable for any beginner.
Autodesk Revit Basics
10. Edit Type — Floors For landscape architects, the floor tool is the most common tool. We use floors to produce numerous features, such as paving and planters. It is very simple to outline a floor, but it is the information that must be added that is imperative. This can be found when selecting “edit type” under properties. Detailed floor information is added in the layer palette; this can consist of the depth of sub-base and what materials are used. Once this has all been modeled in Revit, construction details can be quickly drafted. WATCH: Advanced Revit Architecture 2012 Tutorial – Parking Garage Ramps Using Floors
9. Creating a Topography It is common for landscape architects to receive site data from a dwg file. This site data will often contain spot coordinates with Z values or Z positions. These are essentially points with elevations. These files can be imported into your Revit project and instantly developed into a 3D topography or “toposurface”. It is important that the dwg file should be competently drawn. The spot levels with Z positions should have their own specific layers, so when using Revit it makes it easier to select what layers are actually needed in order to create a toposurface. WATCH: Autodesk Revit Architecture: Creating a Toposurface
8. Understanding Families and Profiles Families are a fundamental part of Revit. The majority of elements in your Revit project are families. A profile is a 2D form that can be created and loaded into your project. These profiles are developed into 3D forms using various tools, such as sweep and extrusion (see below). Common families made from profiles include kerbs and railings. In essence, families are the components in your model (doors, benches, steps), whereas profiles are the 2D forms that create the families, via tools such as sweep. It is important to create an extensive library of profiles that can be brought into your project for future use. WATCH: Revit: How to create a Profile and Wall Sweep
7. Sweep/Create Form The sweep tool is a useful way to wrap around elements. It is important to understand that a profile is what is used to sweep your path. You can either pick an existing path or draw your own. WATCH: 02 Sweep
6. Extrusion Extrusion is relatively similar to the push/pull tool in Sketchup, yet it is often used to create a family that will be imported into your Revit project. It is important to keep an eye on your properties palette and for you to know which level you are using. WATCH: Revit Tutorials: Revit Forms – Extrusion Tool
5. Rendering WATCH: Autodesk Revit Architecture – How To Make A Render
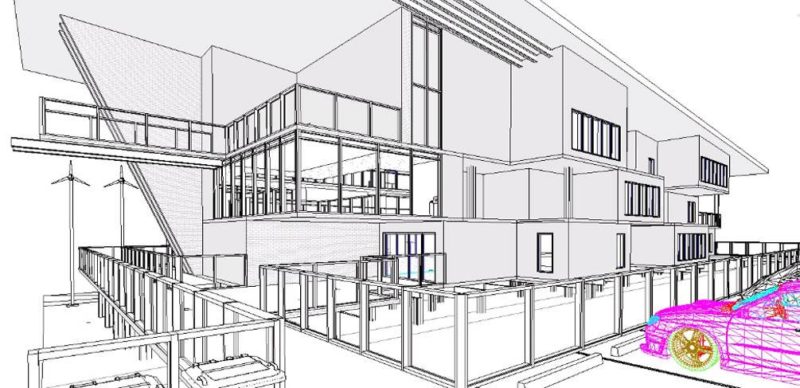
Many students only use Photoshop to create a perspective that will often appear skewed. Revit eliminates this problem, because the visualization is created directly from your 3D model. To start, simply select the camera tool on the top of the screen. Once you have selected the location of your 3D view using the camera tool, select “render”, which is under the view tab. Lighting, site background, and the overall quality of your perspective can all be altered. It is a fast and accurate way to graphically communicate your designs. 4. Revolve The useful thing about revolve is that if you use it, you do not need to revolve your form 360 degrees. This can be edited in the properties palette. You can always go back and change the profile if needed. See these AutoCAD tutorials:
- 4 AutoCAD Commands to Draw Paving Patterns on Curving Paths
- How to Show Topography in your Plan Drawing in AutoCAD
- How to Place Large Quantities of Trees in a Master Plan Instantly with AutoCAD
WATCH: Revit Tutorials: Revit Forms – Revolve Tool
3. Swept Blend Swept blend is an ideal tool for landscape architects, as it can be used to create kerbs. The swept blend tool is really designed for a sweep that starts and finishes in different shapes. However, when creating a kerb around a sloping floor, the sweep blend is much more effective, as the path may twist and turn. Revit will function much more effectively with this command. WATCH: 04 Swept Blend
2. Visibility Graphics Categories such as floors and walls can be switched on or off. It is important to note that the visibility is only adjusted in the view you are on (such as the 3D view or site view). If you are having difficulty finding an element that is not visible, a useful tool is “reveal hidden elements” — shown as a lightbulb symbol in the view control bar at the bottom of your screen. WATCH: Autodesk Revit: Visibility and Graphics (Essential Skill)
1. Trim/Extend to Corner When building floors, it get tedious to use the modify arrow to modify your lines to the desired shape. The trim/extend tool significantly speeds up the process. It works slightly differently than the trim and extend commands in AutoCAD, but is just as effective. WATCH: Revit 2015 Trim/ Extend Multiple Elements
– Understanding the basics of Revit is a great start for any student or professional intending to improve their BIM skills. But it must be asked, should landscape architects work on a program that isn’t specifically tailored to landscape? Revit fundamentally works on flat surfaces and, although a terrain can be achieved, landscape architects may find Revit more difficult than architects who work with more flat surfaces. Ideally, Revit will develop into an even more sophisticated program than it is today, allowing landscape architects to use it just as efficiently. Recommended Reading:
- Autodesk Revit Architecture 2015: No Experience Required: Autodesk Official Press by Eric Wing
- Autodesk Revit Architecture 2014: No Experience Required Autodesk Official Press by Eric Wing
Article by Stephen O’Gorman Return to Homepage Featured image: YouTube print screen. Source.
Published in Blog