5 Easy Steps to Mess Up Your AutoCAD Drawing … and Make it Look Better from our resident AutoCAD expert UrbanLISP to make your work in AutoCAD more efficient. With landscape architecture, we try to shape and organize spaces with trees, plants, water. In other words, we work with nature. When developing a plan in AutoCAD, we work with a computer — just about the opposite of nature. How do we make something look like nature with something that is the opposite? Well, we can randomize! In a previous article, you can read how to do this in sections. In each of the following steps, we use a tool to approach a natural look with trees by randomizing in plan view. WATCH: 5 Easy Steps to Mess Up Your AutoCAD Drawing … and Make it Look Better
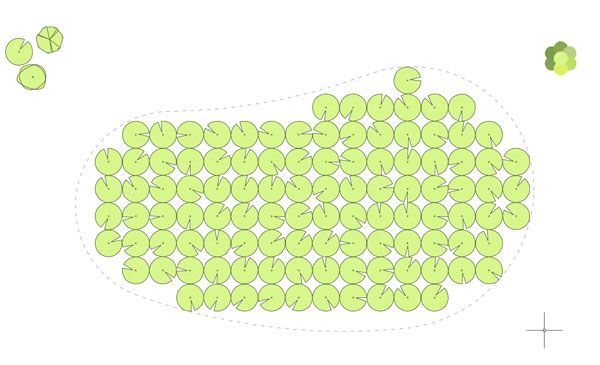
We start with a drawing with tree blocks. There are blocks in a grid, which is easy to draw in AutoCAD, and a few blocks representing a variety of species. In the top left corner, there are hatches with different colors.
0_start
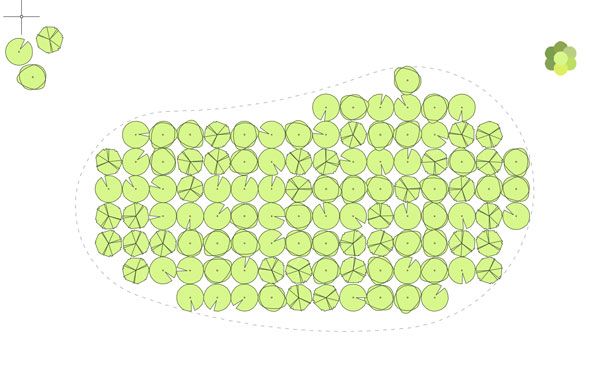
1. Rotate When creating a block, it’s important to think about how you set it up. These tree blocks are set up in such a way that the insertion point is in the center, where the trunk would be. With the ‘Rotate Random‘ command, we can select all the blocks and apply a random rotation. The command uses the insertion point as rotation point, so the blocks stay where they are. After this step, we already see a less rigid composition.
Rotate random
2. Exchange As mentioned in the article ‘10 must do’s to become an AutoCAD professional‘, it’s important to create a library of blocks. And it’s advised to set them up in the same way, the way the blocks in this drawing all have their insertion point in the middle. So when we exchange the blocks randomly, we see the blocks all stay in place, but change graphically. We mixed the species.
Exchange random
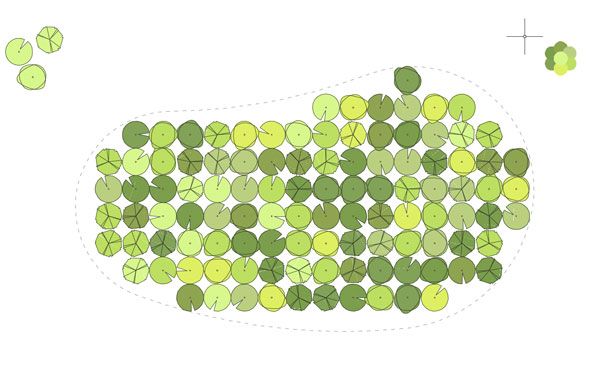
3. Color Although blocks seem very rigid, they can change appearance more than you might think. In this case, all the tree blocks have a hatch in which color is set “By Block”. This means the hatch adopts the color of the block. So when we apply the ‘Color Random‘ command, the blocks will change color and so will the hatches.
Colour random
4. Scale The blocks all have the same size now. By applying ‘Scale Random‘, we change the blocks to a random size. Again, the blocks stay in place because of the carefully chosen insertion point.
Scale random
5. Move After scaling and rotating the blocks randomly, they remain in place, so we have kept control of the position. With the ‘Displace Random’ command, we can move them out of position in a random direction with a random distance. You can also apply the first four steps to blocks that are already placed randomly like we did in the article ‘How to place a lot of trees at once‘. In that case, you can skip this step. Randomizing in 3d with SketchUp But it doesn’t have to stay with 2d plans. Fortunately, SketchUp understands AutoCAD blocks. So when you import an AutoCAD drawing and place a 3d tree in an AutoCAD tree block, your drawing is filled up with trees in no time. In a 2d plan, you want trees to look the same when they are in a row along a street, for instance, to show that it’s a continuous row. It’s a more diagrammatic representation so people understand right away that those trees are part of that row. In 3d, however, it looks very weird when you have a row of 3d trees that look the same. See these AutoCAD tutorials:
You will never find such a row in real life. And with a 3d model, you want to approach real life. One way is to create variations of the 3d tree you have. Creating one 3d tree with leaves is already time-consuming, however. To prevent getting stuck in “designing” trees, you can simply apply “Rotate Random” and “Scale Random” to the blocks before you import them into SketchUp.
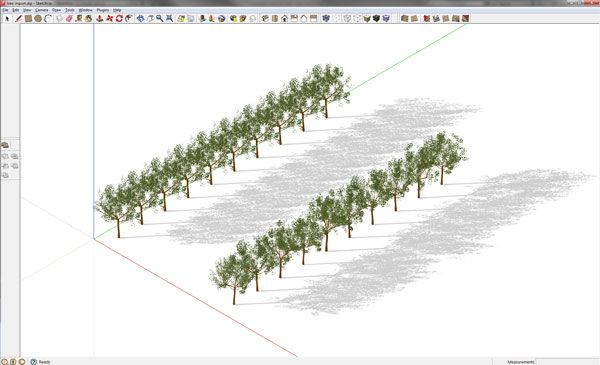
Tree import SketchUp
By rotating them randomly, you essentially look at the same tree but from different sides. They will look like completely different trees. Although we have created very big differences in the tree sizes at step four above, we can also create subtle differences. By scaling the blocks slightly, let’s say from 90 percent to 110 percent (that’s 0.9 and 1.1 when applying the command), the 3d trees look even more unique. In the image, you see two equal rows of trees. The trees in the row on the right are scaled and rotated randomly. You decide which row looks better.
If this is your first time on the new site, please click "Forgot your password?". Follow the steps to reset your password. It may be the same as your old one.


Jatindar Singh
I have read many of your articles on AutoCAD, The information given is very useful. Keep sharing such articles.
Pingback: Autocad Tree Block - Autocad Space