


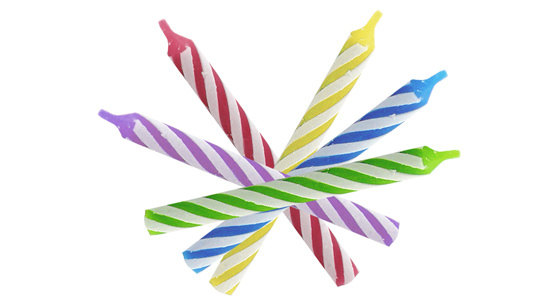
In celebration of May being my birthday month, this tutorial is going to use candles! We all know and use those typical little multi-colored twisty candles but I was only able to find one. Here is the original candle and it’s the blue one. It’s all cropped out and ready to be colored up. So….how do I get different colors?
The best way to make these color changes is to use the Hue/Saturation dialogue box. You can open this dialogue by going to Image > Adjustments > Hue/Saturation. This will open up the following dialogue:

Notice the drop down at the top of the dialogue next to the word “Edit:”. The default is “Master” which means that whatever you do with the sliders, it will apply to the entire image. You may or may not want to make changes to the entire image but I usually like to isolate my colors. If you click on that drop down, you’ll see the following options:

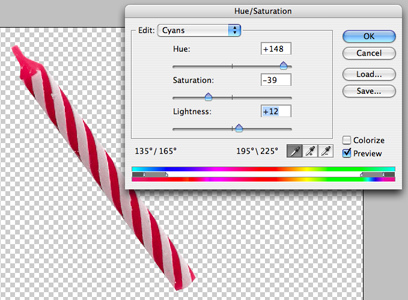
Since with this image, I really just want to change the blue and the cyan, I chose each each of those and adjusted the sliders until I got the color that I wanted for a reddish candle. This is what the candle looks like as red:
Works pretty well doesn’t it? But you’re probably wondering why I used all of the sliders instead of just one. Now I’m going to break down the three different sliders in the dialogue box. The top slider is the one that can seem the most confusing. If you start dragging it around, it’s obvious that it changes the color…but how?
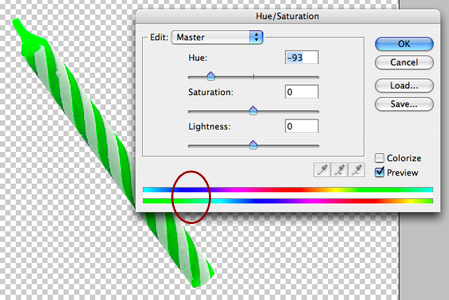
First, leaving the “Edit” drop down as the default of “Master” (changes the whole image), I want you to focus your attention to the two bars of color at the bottom.
– The top bar shows the colors in the original, un-manipulated image.
– The lower bar shows the colors that the image will be changed to.
Notice the red circle on the bars. Remember how the candle was blue? Well now it is green by moving the top slider, the Hue slider, because this slider affects the Hue or the Color. The reason it has turned green is shown in the bars. In the upper bar, where the area is blue, that same area is green in the lower bar which means….everything in the image that is blue, will not be green. Try opening up any image and playing around with the sliders, noting the relationship between the two bars and how it affects the image.
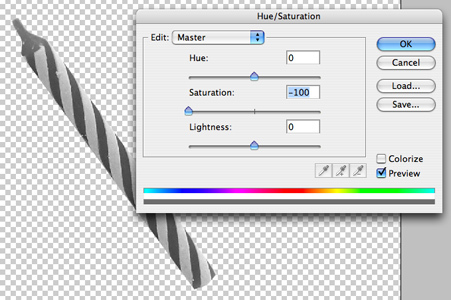
Now for the other two sliders. The middle slider is the Saturation slider which basically means how much or how little color do you want to stuff into that image. This is how it works:
To the left = less color (duller)
To the right = more color (brighter)
NOTE:, if you push the slider all the way to the left, the image will have no color at all. This is a great way to make an image grayscale while keeping it in the RGB mode. You always want to try to keep an image in RGB mode. So from now on, instead of changing the mode to grayscale, all you have to do is Desaturate the image by taking all the color out through pushing the slider all the way to the left. (Or, go to Image > Adjustments > Desaturate for a shortcut)
This is how it looks:
And then for the lower bar, the Lightness bar, this affects the lightness and darkness of the image.
To the left = black
To the right = white
And when this is applied to just certain colors, it can help to dark or lighten. But be careful with it as it treats the color with blanket lightness or darkness, ignoring highlights and lowlights. Personally I don’t like to use it too much, only to add small adjustments, but instead prefer to use Levels or Curves to make major tonal adjustments.
So getting back to the red candle, with the information you now know about how the Hue/Saturation adjustments work, let’s examine what I’ve done here. Looking at the sliders:
– The Hue slider in conjunction with the color bars show that the cyan is reflected as a magenta/red color.
– The Saturation slider has been pushed to the left, or in the negative, because the candle started out pretty saturated or bright and I wanted to dull it down a bit to make it look more real.
– And then the candle was a bit dark so I pushed the Lightness slider a bit to the right, or in the positive, to lighten it up a bit.

Now, all that’s left is to make a bunch of different colored candles. Just duplicate the original candle as many times and necessary and then manipulate the Hue/Saturation according to what colors you want.
Stay tuned for the June tutorial where I’ll show you how to light the candles!
Published in Blog


Kevin J. Gaughan
This is great! Something very simple, but very useful. Thanks Lisa!
Lisa Town
Gotta start out simple before moving on to more complicated stuff! 🙂