


Waterfalls and streams are things that, in my opinion, can greatly effect the quality of your overall render , even if they are only a minor component of the design. Done correctly, they can add life and movement to your rendering, done wrong and they become strangely shaped pools. Today I’m going to go over my rendering techniques for these critical items. As always, feel free to use them, tweak them, or ignore them. Let me know what you think!
Streams and Waterfalls
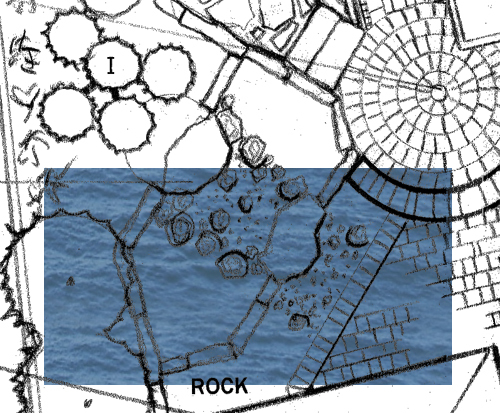
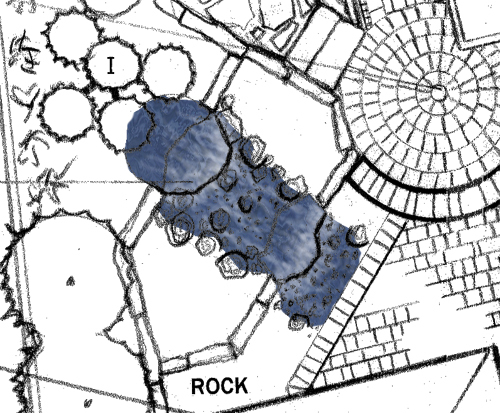
Step 1: Bite Off More Than You Can Chew… Or Need
When you start the stream, the first thing you want to do is pick an area that is a decent bit larger then the area that makes up the stream, to give yourself some room to work.
Step 2: Fill and Distort
Take the area you selected, and fill it with the plain water texture you made with last Tuesday’s tutorial.
Then add the same distortion effects you used last week for the . This gives you the same bubbly water look, which works well for a flowing stream.

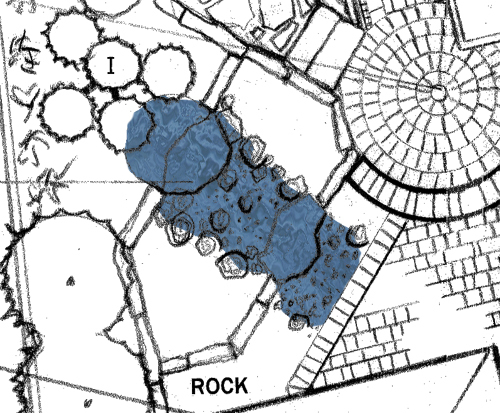
Step 3: Place the Water
Now you first want to rotate the water so the waves run parallel to the flow of the stream. If you have a stream with curves in it, you can either just point it in the average direction, or you could warp the water to make it more closely follow the path of the stream (Although that is probably overkill). Once you have it turned- for this example I rotated it 38 degrees clock-wise. Once you do that, trim the extra water away, leaving just the stream covered in water. You can cut some corners in spots where there will be a boulder or a plan covering the stream, but try to play is fairly close in case the stones get removed for some reason.
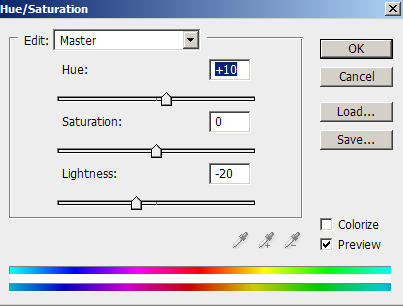
I am also tweaking the shade of blue slightly to get a richer color for the stream, to counter act the lightening that will happen by hand. For this I am selecting the layer with the water, and sliding the hue up by 10, and lightness down by 20.
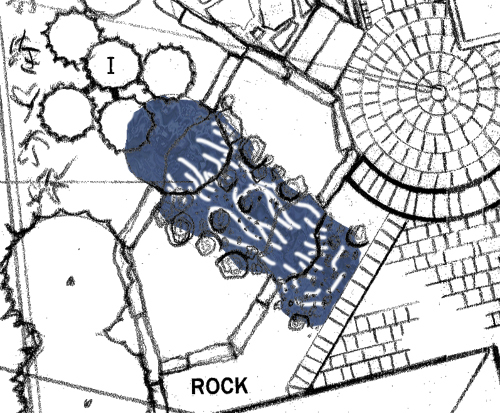
Step 4: Add Some Rapids
To really create a flowing look, both to the stream, and to the waterfalls, use a soft, light opacity brush. I would do this on a sperate layer for now, and merge layers once you get a look you like; you can only take so many steps back in Photoshop – and this uses a LOT of brush strokes – so you could find yourself wanting to undo something past where it is possible. I am using a 5 Pixel round brush with 0% hardness, and 10% opacity, with pure white for the color. You then draw curving lines along the stream- have some curving around rocks, other flowing the length of the stream, and have them ramp up as you approach the waterfall, then even as the waterfall drops, and then a quick drop off after the waterfall “Lands”. If you used 100% opacity, it should look something like this at first:
The final result, with the 10% opacity, looks like this:
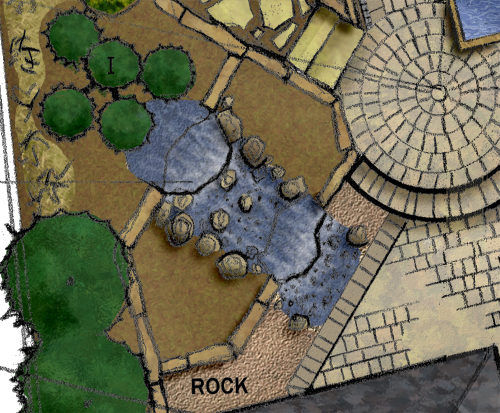
Step 5: Base
Now, fill in the surrounding landscape, including plants, rocks, and the like. One touch to add is to make a gravel stream bed, so the transparent base looks a little different then the surrounding area.

Step 6: Just Add Water
Now add your water back in, merge it with your layer of white details, and drop the transparency to about 85%. Congratulations, you have a stream!
Next Week: Wetlands


Andrew Spiering
Nice trick! Thanks for sharing another great tutorial.
Landon Davidson
Very useful. Thanks.