


In last month’s tutorial on Advanced Blending we took a look at the Blend If section in the Layer Style dialogue box. We discussed the difference between the two sliders in that section. These are:
This Layer: Controls the current or active layer and how it blends with what is below it and,
Underlying Layer: Controls the layer below the active layer and how it blends with the active layer
In the previous tutorial we focused on the top section labeled “This Layer:” This month, as Part 2 of the series on Advanced Blending, we will now look at the lower section labeled “Underlying Layer” and see how this can be used.
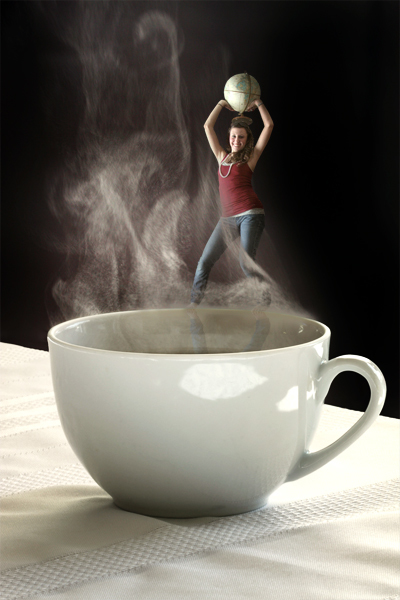
I’m going to start with two images. One is of a steaming coffee cup and another of a girl dancing on a desk at work. Something I often like to play around with when I’m exploring new techniques in Photoshop is to grab two or more seemingly unrelated photos and try to create a believable scene. Dealing with scenes that go beyond reality and explore more of the hyper realism helps to make it more fun and seem less like work. And not only that but trying to make something impossible look believable can often times be difficult and will further challenge your skills as a photoshop artist.
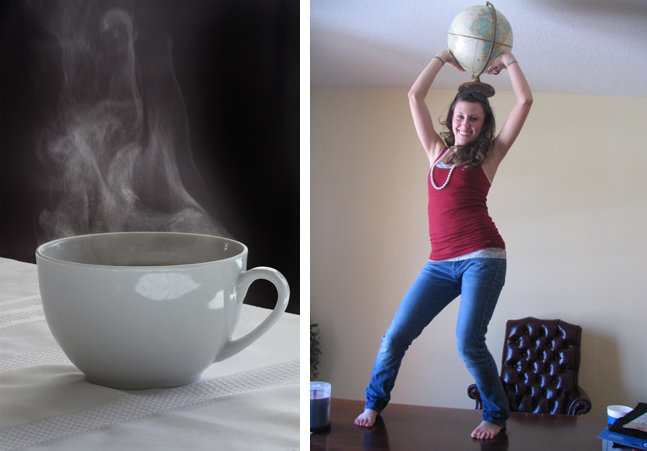
Sure I could’ve decided to have some kids frolicking in a misty fountain but that sounds a bit too much like something I would do at work and we want to keep this interesting. I’m going to do something a little more fun and have this girl dancing on the rim of the coffee cup while she is enveloped in steam.
First I crop out the girl and drop her into the coffee cup image.
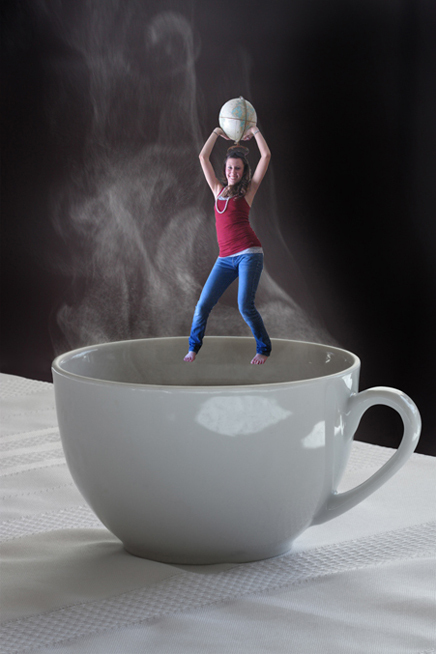
Next, I take a look at the steam and position the girl on the rim where it looks like the steam could be wrapping around her body in a believable way. And then I open up the Layer Style Dialogue box by either double clicking on the layer where I’ve placed the girl or by going to the drop down menus and choosing Layer > Layer Style > Blending.
In last month’s tutorial, I already showed you the difference between the Blend If and the Blend Modes as well as how the sliders behave. If you haven’t read through the tutorial, I suggest that you do so at this time. So now I’m going to perform the same actions, but instead of using the “This Layer:” part of the Blend If, I’m going to use “Underlying Layer:”.
The reason here is because I want the active layer (the girl) to show or hide certain parts of the layer dependent upon the underlying layer (the coffee cup). Note, this will control not just the one underlying but ALL layers beneath the current one, not just the one directly beneath the active one, so be aware of this.
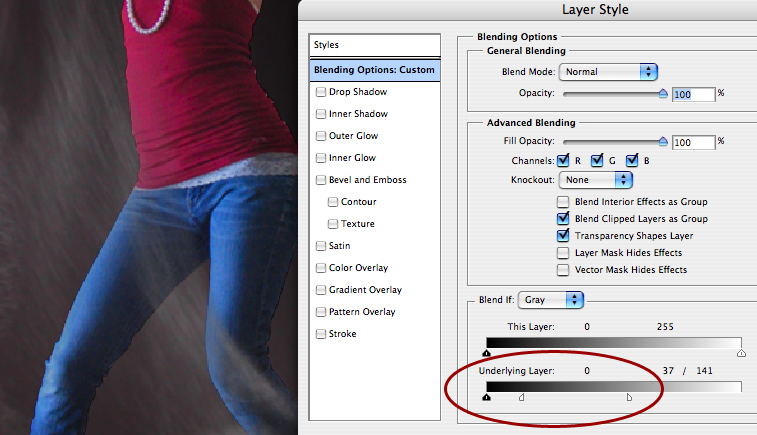
I’ve pushed the sliders around and adjusted them according to what I’d like to see. The image above shows the numbers in the dialogue box that I found to work for this image in allowing the steam to curve around her legs but still be translucent enough to still look like steam. And here’s what the numbers mean:
-Everything brighter that 141 on the underlying layer (coffee cup) will be hidden in the active layer (girl)
-Everything darker than 37 on the underlying layer (coffee cup) will be visible in the active layer (girl)
-Everything in between 37 and 141 in the underlying layer (coffee cup) is smoothly blended/faded in the active layer (girl)
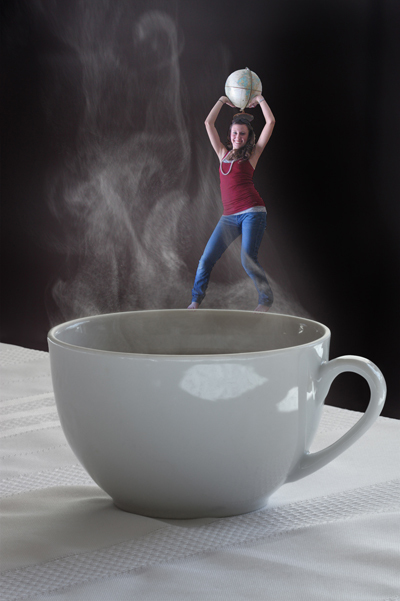
The above image obviously doesn’t look terribly believable so just another minute of touch ups to make it all fit together with some realistic highlights, shadows and reflections and making the two images have a similar color and then, voila, here’s what a final image might look like.
I know you aren’t going to be drawing up any people dancing through coffee steam anytime soon but just imagine that you could use this for nearly any kind of atmospheric thing you want something to sort of poke through may that be kids in a fountain, birds/planes in the sky, a sculpture or bridge poking through the haze, or people walking in the Seattle rain…whatever! Chances are, if it’s atmospheric and seems impossible to crop or blend, you can make it work using Blend If!
Published in Blog


Robert Haught
great tutorial!!
Susan Hughes
Yeah, this is very helpful info– thanks Land 8 for showing it to me!
Barte Shadlow
Thanks, Lisa. Another Photoshop trick that I would otherwise never know about.
Susan Hughes
PS- And Thanks, Lisa for posting it!
Omar Jaramillo
great tutorial!
Jeremy Merrill
Very helpful, thank you.
Anna Yorba
Lisa, thank you so much for taking me beyond old habits. Your help is VERY valuable. Anna
Mauro Crestani
Thanks for the tip! Very useful