


Whoa, where did the month go? Well we can’t let the month get away without another Photoshop tutorial!
In this tutorlal we’ll go behind blanket blend modes and look at a more advanced level of blending with a highly useful yet mostly overlooked and misunderstood feature hidden away in the Layer Style palette. This feature allows you to hide or show elements automatically without the need of a brush or mask.
This is a great technique when dealing with things that are impossible to crop and even the Blend Modes won’t work right because you may not want the entire object to blend, only specific areas. What if you want to create an image montage of a kid running through a misty fountain? Or birds flying through clouds? Or a fireworks celebration off the water from your newly designed waterfront promenade at night?
It can be done!
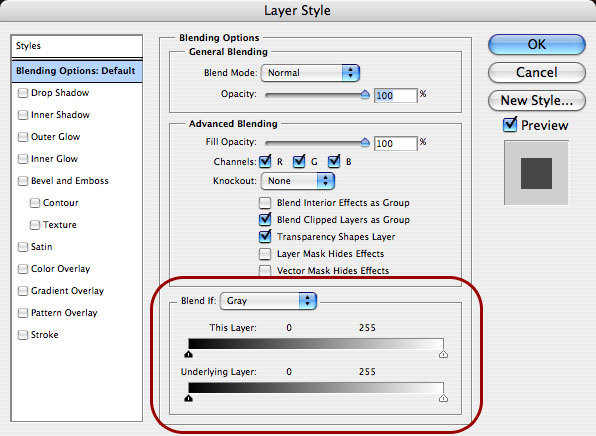
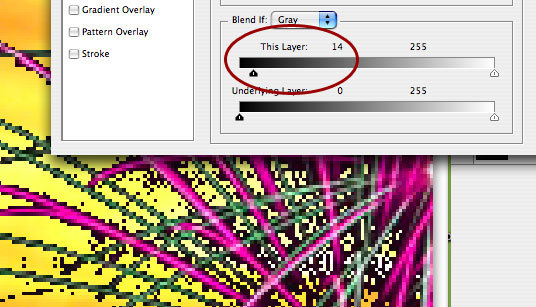
First, double click on a layer to open the Layer Style dialogue box or chose from menu drop down menu Layer > Layer Style > Blending Options. Chances are your eyes immediately look to the left of the box where all the options like Drop Shadow exist right? But what about all the crazy information in the middle and what on earth are all those sliders for at the bottom? Well that area that says Blend If: is exactly the area we are going to focus on in this tutorial. See the area circled in red below:
I grabbed in image of fireworks which I will blend into a lighter colored sunset photo just so you can see how this works. See below the original photographs of the fireworks and the background.
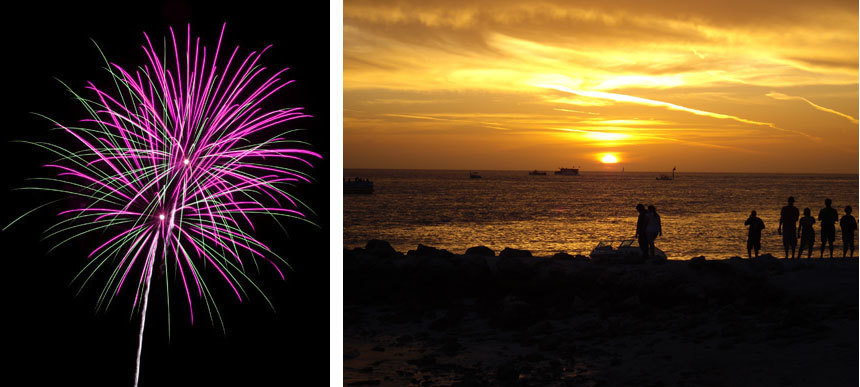
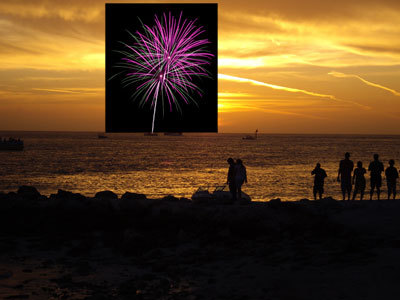
If I put the fireworks photo on the sunset background then you can see the black background won’t let the sunset show through.
But then if i use a Blend Mode it will change the way the entire fireworks image will react with the background. If I use the Screen mode, it will get rid of the black effectively, but it also changes the color of the fireworks and they look too light on the lighter background and the are almost unnoticable.
So how do I leave the colors of the fireworks themselves alone and just blend the black of the current layer with the underlying sunset layer and that’s all?
Let’s take a closer look at the Layer Style palette and that magical Blend If section.
There are two sliders
This Layer: Controls the current or active layer and how it blends with what is below it and;
Underlying Layer: Controls the layer below the active layer and how it blends with the active layer
These sliders are on a scale from 0 to 255. In the RGB scale that means 0 is black and 255 is white.
The sliders are currently all the way at either end, meaning there is no blending going on. In order to start the blending, the sliders need to move. So I’ve zoomed in on an area of the fireworks and pulled the black triangle slider on the left over to the right where it is now at 14, it was at 0. What this means is, anything from darker (lower in number) than 14 will be hidden.
If you look at what it did to the image, you will see that a bunch of pixels have now gone away.
Amazing right? Well, not really because it looks horrible and jagged from all the pixels and it still has a black fringe. So that means I should keep pulling the slider over till all the black is gone right? Let’s try it:
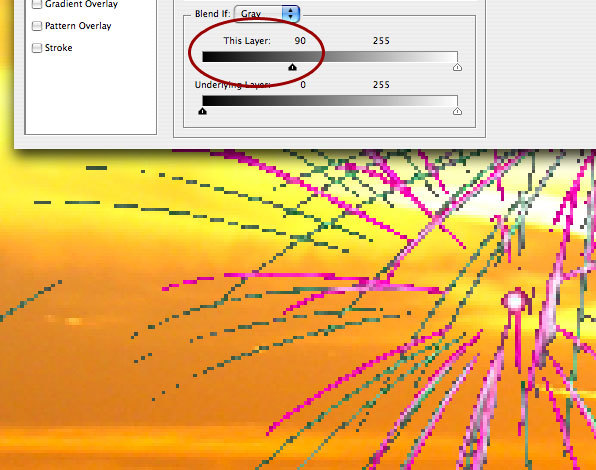
That didn’t really work either because now some of the actual fireworks are missing and it’s still jagged and doesn’t look nicely blended. We need a more realistic effect…and an even closer look at these sliders. Do you see what looks like a little white line in the center of the black triangle slider? It’s not actually a line but a joint because what seems like two sliders is actually one joined together. We need to break them apart for some fine tuned blending.
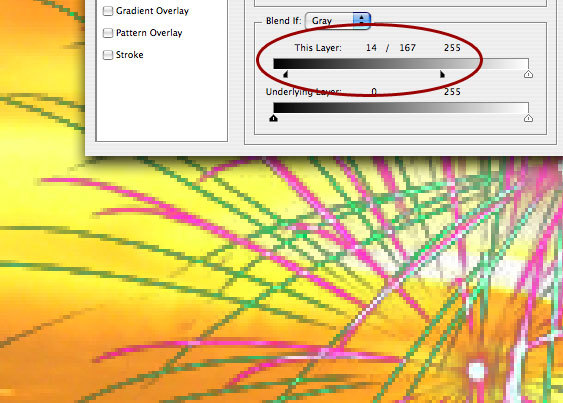
So with the black triangle at 14, hold down the alt key (control on mac) and click and drag the slider to the right and you’ll break it apart. Take it all the way down till you like what you’re seeing. What this means is:
– everything darker than 14 is hidden
– everything lighter than 167 is left alone
– everything from 14 to 167 is blended/faded perfectly smooth
Check it out:
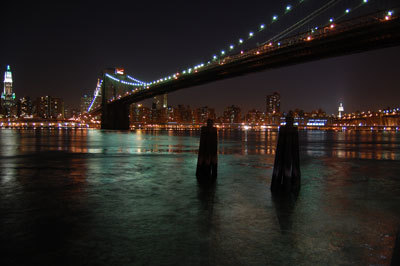
The sunset photo doesn’t really fit with the fireworks so I have to show another photo that is more fitting. I just wanted to use a light background image so you could really see how the Blend If works and why it’s useful.
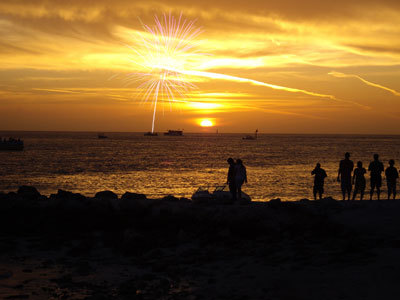
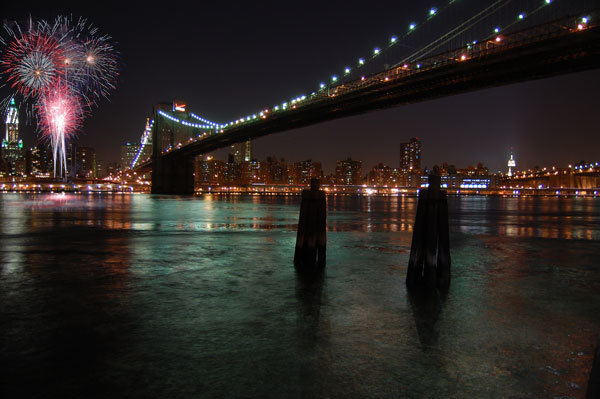
Check out the better matched montage below….original photo and then the one with the fireworks added using the Blend If strategy for a perfectly seamless image.
In the next tutorial, we will explore more examples of how this can be used and delve even further into the power of Blending.
Published in Blog


Brice Maryman
nice post lisa! great tutorial. i hear you’ll be in the office this week?
Kevin J. Gaughan
Another excellent tutorial, thanks Lisa!
Joe Sampsell
This is good stuff. Thanks for sharing your knowledge.
Jaime Snyder
Great, useful info! Thank you!
Clayton Munson
I agree these are great tutorials. I’ve learned so much from these. Thanks for doing them and I can’t wait for the next one.
HUSSEIN KIWAN
thanks,……well done