


Author: Land8: Landscape Architects Network


The Butterfly Bridge Opens its Massive Wings to the Public
Butterfly Bridge by Dietmar Feichtinger Architects, in Christianshavn Canal and Trangraven, Copenhagen, Denmark. The capital and most populated city of Denmark is Copenhagen, one of the oldest capitals in Europe and part of the most dynamic region too. In the 10th century, Copenhagen used to be a Viking fishing village surrounded by rivers. Its name in Danish reflects, in fact, its origin as a harbor and place of commerce. Copenhagen is located on the eastern edge of the island of Zealand and partly situated on the island of Amager, (these two are connected by five bridges) and on a number of natural and artificial islets between them. It is also part of the Øresund, commonly known as “The Sound” in English, which is the strait that separates Denmark from Sweden, specifically the Danish island Zealand from the southern Swedish province of Scania. One of the Most Environmentally Friendly Cities in the World Copenhagen is one of the most environmentally friendly cities in the world, by using renewable energy such as solar panels, recycling rainwater, green roof and efficient waste management solutions, reducing electricity consumption and also by reducing considerably the use of private transportation. By 2025, 75% of trips could be made on foot, by bike or by using public transportation.
Cykelslangen in Copenhagen, making sustainable travel possible. Credit: DISSING+WEITLING
The Butterfly Bridge
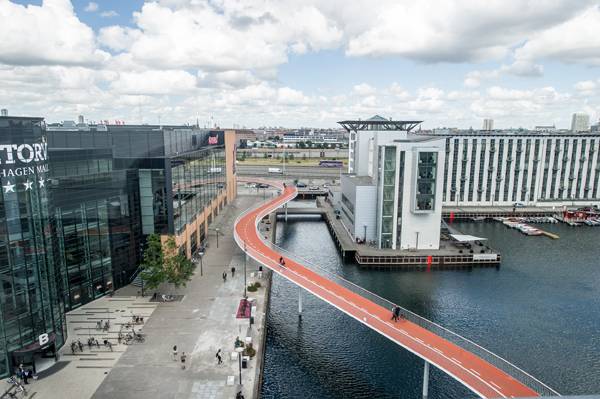
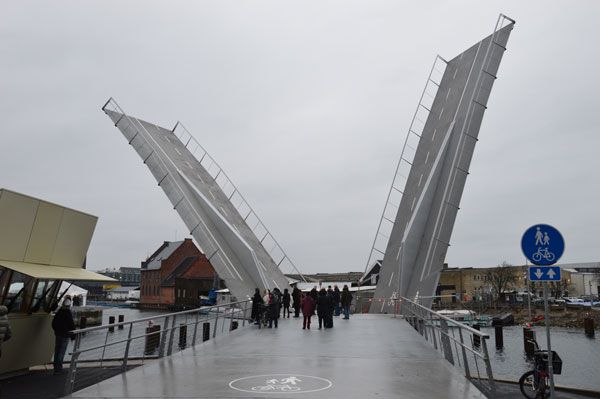
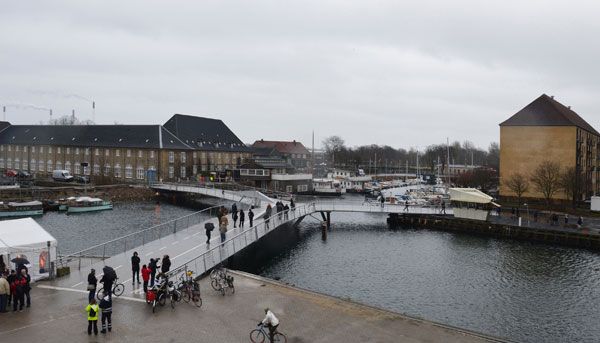
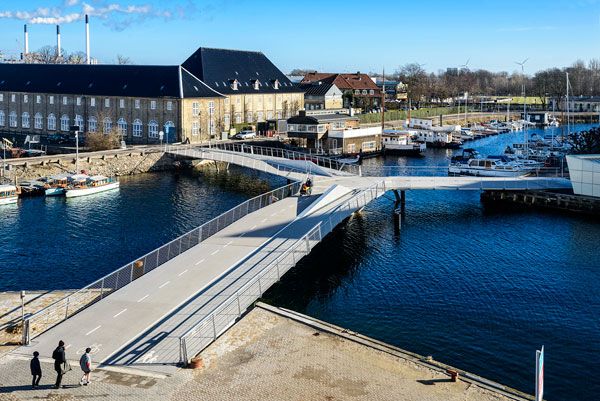
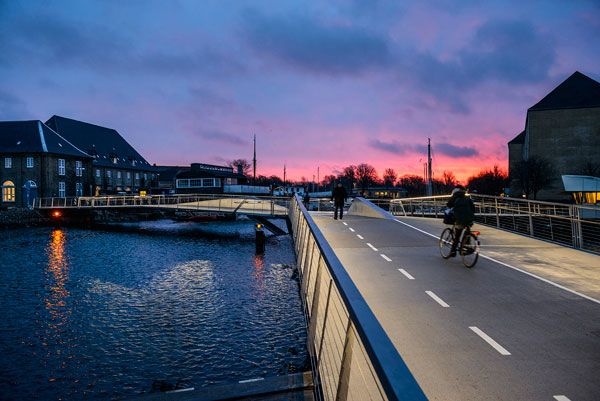
The Butterfly Bridge is the most recent example of this environmental commitment. It is a lightweight foot and cycle bridge designed by the French firm Dietmar Feichtinger Architects finished in January 2015. The bridge connects Christianshavns Kanal and Trangraven, it’s designed as a three linear bridge, adapting itself to every individual situation of the canals.
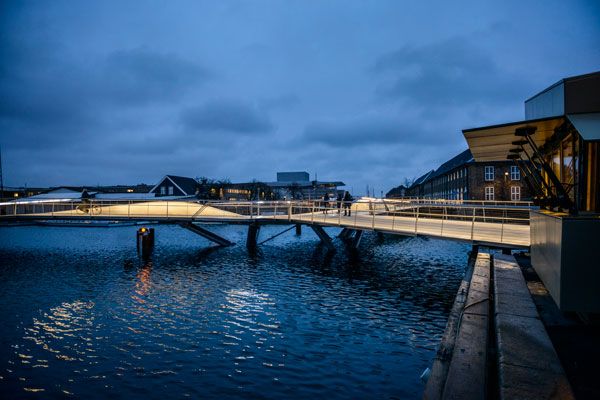
The Butterfly Bridge. Photo credit: Christian Lindgren
Photo compilation of The Butterfly Bridge. Photo credits: Barbara Feichtinger-Felber
The Butterfly Bridge. Photo credit: Barbara Feichtinger-Felber
The Butterfly Bridge. Photo credit: Barbara Feichtinger-Felber
The Butterfly Bridge. Photo credit: Christian Lindgren
The Butterfly Bridge. Photo credit: Christian Lindgren
Recommended Reading:
- Landscape Architecture: An Introduction by Robert Holden
- Landscape Architecture, Fifth Edition: A Manual of Environmental Planning and Design by Barry Starke
Article by Tahío Avila


Sketchy Saturday |036
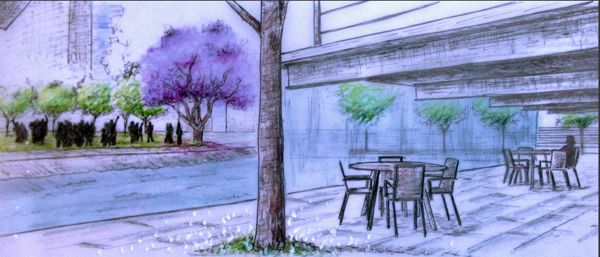
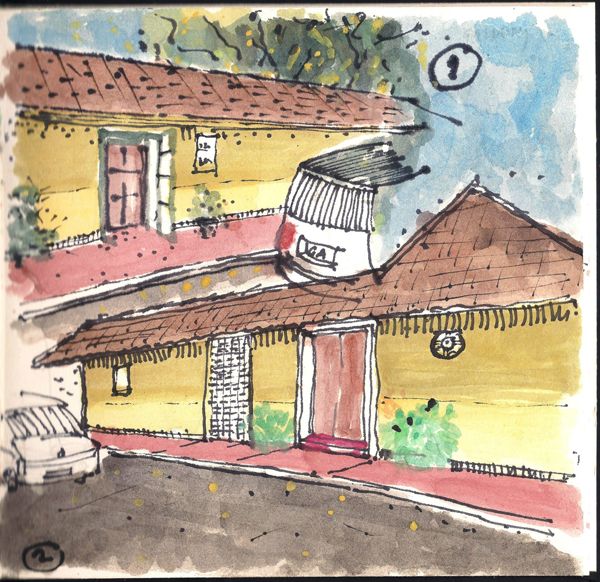
This week’s Sketchy Saturday top 10. This week’s Sketchy Saturday top 10 brings with it a rich diversity of styles as well as artists as we reveal works from everything from professionals with a wealth of experience to students just starting out on their journey in design. And of course at LAN we’re so happy that we can join you on your journey no matter where you are. One thing that struck us about this week’s selection is that each style has its own strength and influence, from the minimalist approach to the highly illustrated approach, each has the ability to convey different aspects of the subject, and there is certainly not one style that suits all situations. Working to your strengths will always beat working on your weaknesses. Enjoy this week’s Sketchy Saturday top 10! 10. by Münire SAĞAT, landscape architect at Studio BEMS Landscape Architecture and Urban Design, in Turkey, Ankara
By Münire SAĞAT
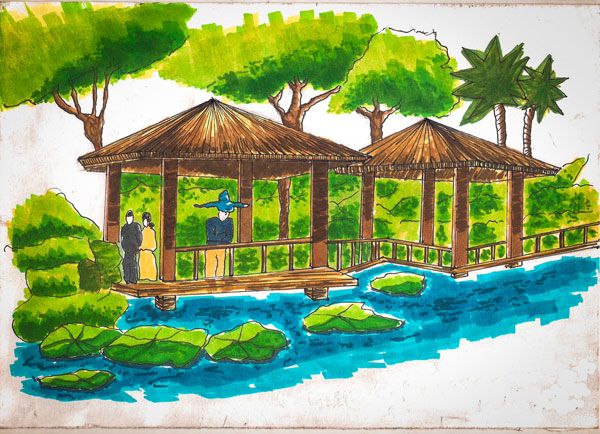
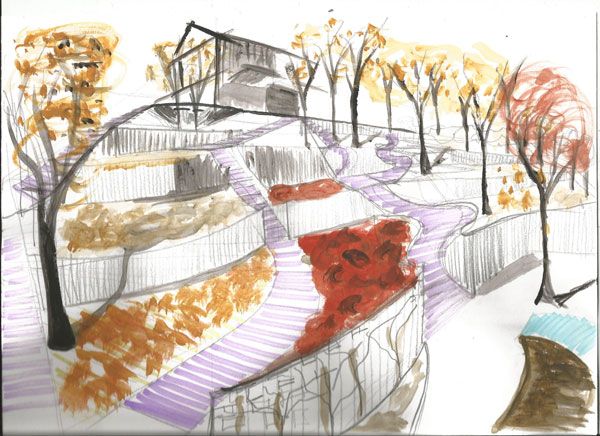
By Mayra Alves Zanin
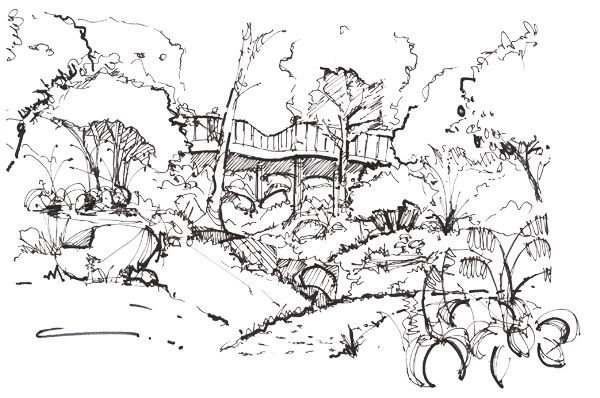
Mohammed Zaki Hosni
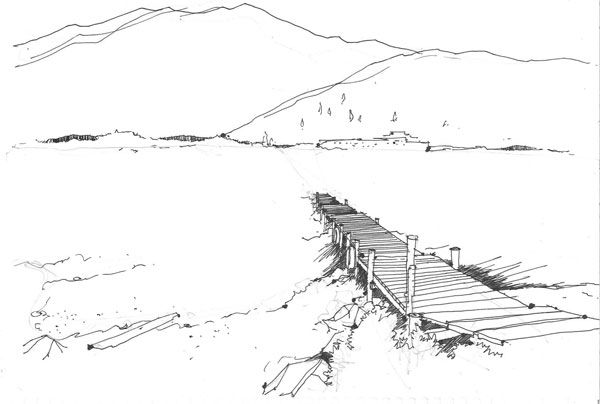
By Blake Andera
By Benjamin Loh
By Manoj Joshi
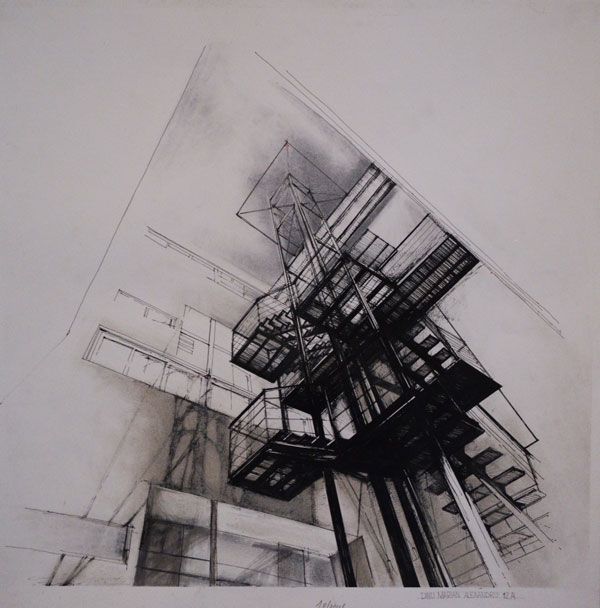
By Dinu Marian Alexandru
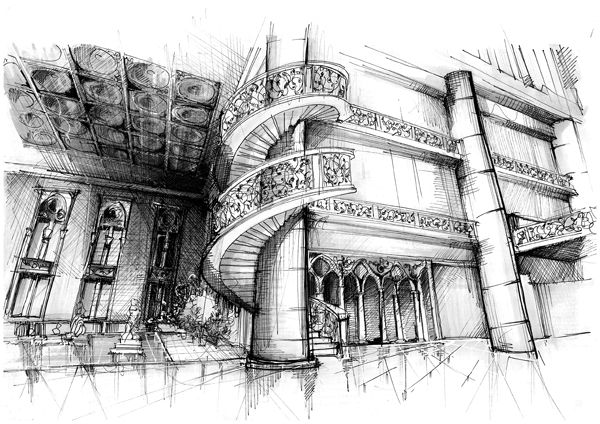
By Raluca-Mihaela Serdaru

Delia Bittner
By Rawan Waleed Al-Qabbani
- Sketching from the Imagination: An Insight into Creative Drawing by 3DTotal
- Architectural Drawing Course by Mo Zell
Article by Scott D. Renwick Return to Homepage


How Landscape Architects Are Leading the way in Sustainable Cities
With sustainable cities being one of the key terms in the 21st century, we take a closer look at the role that the landscape architect has to play in it all. When we think of sustainability we think of living in a remote natural area with solar panels, on-site sewage treatment, a large vegetable garden and maybe even some livestock. Pretty sustainable hey? Maybe not. In fact, one of the leading causes of climate change is due to people seeking escaping the city in search of nature. By living on the outskirts of the city, we increase our carbon footprint through commuting and encroach further and further into the natural environment. Thus, in order to think sustainably we need to realise that our dense inner cities are not the problem, but, in fact, the solution! With this in mind, one would think then that the sustainable cities equal “green buildings”. While architects and engineers have great progress in these fields recently, their efforts only address a very small portion of the problem. The same goes for re-using, reducing and recycling: everyone should be doing this, but it won’t necessarily save the world.
Sustainable Cities
Landscape Architects to Save the World This is where the landscape architect comes in. We have the ability to not only begin to make cities more liveable, but also have the ability to understand the complex relationship between the city and the natural environment. Our holistic approach allows us to see the city as an organism where urban density and natural processes can come together to create a sustainable solution. Green Infrastructure One of the ways in which landscape architects address this problem is by bringing nature into the city, satisfying the human need to connect with the natural environment. This is, however, not about creating green parks where people in the city and escape into nature, but involves creating green networks and habitats. This concept has been implemented in a dramatic scale by the landscape architectural firm, Field Operations, in the High Line project in New York where the disused elevated railway was turned into a green public park. This shifted the concept of a traditional urban park, allowing nature to become part of the urban fabric.

The Highline is a great example of a planting scheme increasing biodiversity in an urban area; credit: shutterstock.com
- Are Animal Bridges Life-saving for Wildlife?
- WARNING: Why You’re Losing Money By Not Using a Green Roof
- The Urban Matrix: How Far Should We Go?
WATCH: Brooklyn Bridge Park Conservancy | A Micro-Documentary
Their recent project, Brooklyn Bridge Park, focussed on the emotional power of social connection with the Hudson River while providing sustainable design solutions, creating habitat and increasing economic value. Sustainable Urban Drainage Water is a critical aspect of sustainability as our planet’s water quality and quantity is slowly diminishing. This is of even more importance in the context of the city due to an increase in hardened surfaces and pollutants.

Qunli Stormwater Park. Photo credit: Turenscape
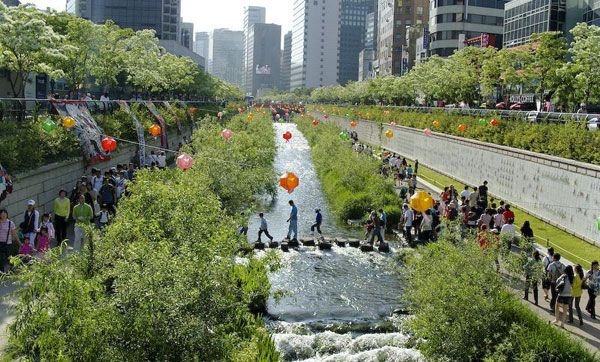
Korea Seoul Cheonggyecheon. Credit: stari4ek – originally posted to Flickr as fest2-01. Licensed under CC BY-SA 2.0, source
Planting a City Landscape architects have also begun to find unique ways to introduce nature into the built environments. Vegetation in the city not only improves streetscapes but also creates a natural habitat, reduces of the heat island effect of built infrastructure, improves air quality and can even increase food security through growing edibles. One of the greatest examples of this is the Millennium Park in Chicago by landscape architect Terry Guen. The park is, in fact, a 24.5-acre roof garden and sits above a parking lot and railway, making it the largest roof garden in the world.

BP Pedestrian Bridge in Millennium Park in Chicago, Illinois, USA. Photo credit: Author: Flickr user KE4SFQ. Licensed under CC-SA 2.0
- Happy City: Transforming Our Lives Through Urban Design by Charles Montgomery
- The Death and Life of Great American Cities by Jane Jacobs
Article by Rose Buchanan Return to Homepage Featured image: Printscreen via Youtube source

Representing Landscapes: Digital | Book Review
A book review of Representing Landscapes: Digital by Nadia Amoroso. Landscape architecture has benefitted a lot from advancements in technology, with digital media techniques allowing specialists from the field to show both their talent and imagination. ‘Representing Landscapes: Digital’ is the kind of book that you instantly fall in love with, presenting the digital media techniques used in the field of landscape architecture, from the point of view from different experts in the field. Edited by Nadia Amoroso (link to interview), a renowned name in the field of landscape architecture and with a foreword from James Corner, professor of Landscape Architecture, this book is useful for both students and specialists alike.

Front cover of Representing Landscapes: Digital
Representing Landscapes: Digital
The introduction bears the trademark signature of Nadia Amoroso, landscape architect, teacher and book author. In her opinion, this book provides the most amazing visual representations that were made by students from different parts of the world, all of them being realized with the help of digital media. Mrs. Amoroso describes this book as ‘instructional’ and ‘inspirational’, recommending it to those who are working or studying in the field of landscape architecture.

Front cover of Representing Landscapes: Digital

Inside Representing Landscapes: Digital. Photo credit: Alexandra Antipa

Inside Representing Landscapes: Digital. Photo credit: Alexandra Antipa

Inside Representing Landscapes: Digital. Photo credit: Alexandra Antipa

Inside Representing Landscapes: Digital. Photo credit: Alexandra Antipa
Pick up your copy of Representing Landscapes: Digital today!
Review by Alexandra Antipa Return to Homepage

How Capitol Singapore is Bringing Luxury Design to the Public
Capitol Singapore redevelopment, by Grant Associates, in Singapore. What would you do if you had $1.1 billion? I guess every one of us could come up with thousands of ideas and wishes to answer that question. When the government of Singapore faced this question, they decided to do something for the people of their capital city. They invested the money in the redevelopment of the Capitol, a very important and interesting heritage site in the city’s downtown civic district. According to Keith French, director at Grant Associates, the new design will have respect for the existing elements of the Capitol: “The Capitol landscape and public realm strategy have been developed with a respectful approach to the civic and heritage setting (with) consideration of the vistas and views through to the Capitol Theatre, as well as the views out to the adjacent St Andrew’s Cathedral.”

Capitol masterplan. Image credit: Grant Associates
Capitol Singapore
The site comprises three existing buildings: the Capitol building, the Stamford House and the Capitol Theatre. These will be supplemented by a new build integrated into the theater. This new blend will feature four elements: luxurious residences (Eden Residences), an ultra-luxury hotel (The Patina), a retail mall with flagship stores (Capitol Piazza), and the existing Capitol Theatre.

Capitol Aerial. Credit: Capitol Holdings
- The Sensational Hive Project by World Renowned Grant Associates
- Gardens by the Bay Has Changed the way we Look at Landscape Architecture Forever
- 5 Great Ecological Powerhouses of Landscape Architecture
This high-end project isn’t going to be just a luxury site; it will be complemented by a restored public realm, including a new civic plaza with a focus on city events and activities, alongside residential roof gardens and terraces. In this way, the redevelopment will provide a new attraction for the broad population. Or, as French puts it: “A new city plaza is at the heart of the scheme and the central focus of the development. It is conceived as an original and crafted civic space that will be a new destination for Singapore — a space for events and theater, red-carpet galas, a place to gather. a place to rest and seek shade.”

Night View to St. Andrews Cathedral. Credit: Grant Associates

Water Blades. Credit: Grant Associates

Plaza Paving Detail. Credit: Grant Associates

Capitol. Credit: Grant Associates

Galleria. Credit: Grant Associates

Amenity Deck with Infinity Pool. Credit: Grant Associates

Private Penthouse with Infinity Pool. Credit: Grant Associates

Above: Apartment Interior and Exterior. Credit: Capitol Holdings. Below: Spa Pools. Credit: Grant Associates
Recommended Reading:
- Landscape Architecture: An Introduction by Robert Holden
- Landscape Architecture, Fifth Edition: A Manual of Environmental Planning and Design by Barry Starke
Article by Tom De Bleser


How to Draw Like an Artist, With These 7 YouTube Tutorials
Good hand drawing skills are an excellent tool for any landscape architect to have. But here’s a little secret, you don’t have to be born with it, you can learn. On our way to becoming skilled artists, we have to learn lots of lessons and often fight inner voices that tell us to give up because we are “just not good enough”. However, we don’t have to master this challenging process on our own! On the one hand, there are countless beginners who struggle the same as we do; but on the other hand, there is this huge YouTube artist community trying to motivate and support us as we improve our drawing skills. These great Samaritans post thousands of free videos to help us continue practicing our drawings and give useful advice. In this article, I found and summed up the best seven videos for novice artists. 1. How to Get Started — A Motivation Boost To tackle the improvement of your drawing skills, you just need to do one simple thing: Keep on drawing, no matter how much you hate your drawings in the beginning! I know for myself that this sounds easier than it turns out to be. However, drawing is in fact just a skill that can be learned and improved over time. The author of this video clears up with some myths about drawing and no longer accepts excuses of people claiming they can’t draw. Everyone can learn how to draw, so please sit down and watch this motivational boost. WATCH: The Best Ways to Learn Drawing
2. How to Draw Basic Figures The most basic thing every artist has to learn is how to draw figures. This important lesson is explained in an easily understandable way and slowly enough to allow you to draw simultaneously on your own with the video. Additionally, you will get an insight into the anatomical relations of the human body. Grab a pencil and a piece of paper and start practicing your figures. WATCH: How to Draw the Figure from the Imagination
3. Details are Nothing Without Gesture This video lesson teaches us about an important element that makes drawings look dynamic –gesture. The best way to familiarize oneself with gesture is through quick sketch drawing. To express emotion in drawings, it is important to focus on quick and elongated “action lines” as seen in this video. WATCH: How to Draw Gesture
4. Shadows and Shading Cross hatching, parallel lines, smudging — there are different ways to shade your objects or figures in a drawing. This short video presents those types in an easy-to-understand manner, using simple forms that will allow you to practice them right away. WATCH: Shading Lessons: Learn How to Draw Shades
5. Expensive Drawing Materials are Overrated Even if professional artists own a wide range of drawing supplies, you don’t need to amass a plethora of expensive drawing equipment. In my opinion, a soft pencil (2B), paper, and maybe an eraser are sufficient to begin with. In your ongoing drawing process, you will find yourself getting more confident in trying out new drawing styles that require other tools. If you have already reached this stage, or if you want to be prepared for everything from the beginning on, this video will help you make the correct choice of drawing materials. Other Articles You May be Interested in:
- Freehand Drawing & Discovery, by James Richards | Book Review
- Hand Drawing versus Computer Rendering. Which is Best for Landscape Architecture?
- Drawing for Landscape Architecture, by Edward Hutchison l Book Review
WATCH: Drawing Class: Beg Drawing I: Drawing Materials
6. How to Draw Perspective Perspective drawings are the key to an authentic and real look. Perspectives vary in their number of disappearing points; the most common ones are 1-point perspective, 2-point perspective, and 3-point perspective, which are all used in this video. If you are already familiar with the very basics of perspective drawings, skip the first six-and-a-half minutes and watch the author draw a simple, but beautiful landscape in the second half. WATCH: How to Draw Perspective
7. Keep on Practicing In the end, I wanted to give you some advice as shown in this video: To become a confident artist, you must practice drawing over and over again. For example, if you want to draw portraits, the best way is to fractionize the face and learn to draw various eyes, noses, mouths, ears, and so on. Of course, the same applies to trees in landscapes and items in every other drawing, too. WATCH: How to Practice Drawing
– As we all know, the world of YouTube is endless. That’s why choosing only seven videos that should be representative for teaching us how to draw was a really difficult task. The recommended videos aim to explain only the most important steps in getting started with drawing. Although I hope those were very helpful for you, please keep watching other videos to practice the topics that you are truly interested in and seek for your own drawing style.
Recommended Reading:
- Drawing and Designing with Confidence: A Step-by-Step Guide by Mike W. Lin
- Landscape Perspective Drawing by Nicholas T. Dines
Article by Sophie Thiel


Solar City Shows us How to Practice Sustainable Urban Development
Solar City, by Atelier Dreiseitl, in Linz-Pichling, Austria. Debates on the subject of sustainability arose in the 1970s and reached their peak in the 1990s. Nevertheless, this debate remained on a theoretical level. Thus, a question emerged: How can sustainability be applied in practice? The Solar City project in Linz-Pichling, Austria, is an attempt to unite different perspectives – social, environmental, and economic — and has the goal of becoming a European example of sustainable urban development. Atelier Dreiseitl, the landscape designers, has the ambition to promote sustainable projects with a high aesthetic and social value. As one of the leading landscape architects of Germany, they are a specialist in ecological landscape design and water concepts.

Solar City. Photo credit: Pertlwieser
Solar City
As in other cities around the world, Linz had an accelerated population growth in the 1990s, with an enormous demand for housing. Due to the fact that the city owned large, connected pieces of real estate in Linz-Pichling, that urgent need for expansion resulted in the Solar City project. It is located in a rural ecologically and legally protected wetland, in the narrow area between the Traun and Danube rivers. The designers had to deal with these issues in order to realize high architectural and ecological quality. The landscape design had to ensure that the natural value of the protected areas would not be harmed by the building development.

Solar City. Photo credit: Pertlwieser
- How The Chicago City Hall Green Roof is Greening the Concrete Jungle
- Potsdamer Platz in Berlin Becomes a Sustainable Ecofriendly Urban Square
- How Bishan Park Became “The Central Park” of Singapore

Solar City. Photo courtesy of Atelier Dreiseitl

Solar City. Photo credit: D. Moet

Solar City. Photo credit: D. Moet

Solar City. Photo courtesy of Atelier Dreiseitl

Solar City. Photo courtesy of Atelier Dreiseitl

Solar City. Photo courtesy of Atelier Dreiseitl

Solar City. Photo courtesy of Atelier Dreiseitl

Solar City. Photo courtesy of Atelier Dreiseitl
Recommended Reading:
- Landscape Architecture: An Introduction by Robert Holden
- Landscape Architecture, Fifth Edition: A Manual of Environmental Planning and Design by Barry Starke
Article by Ruth Coman


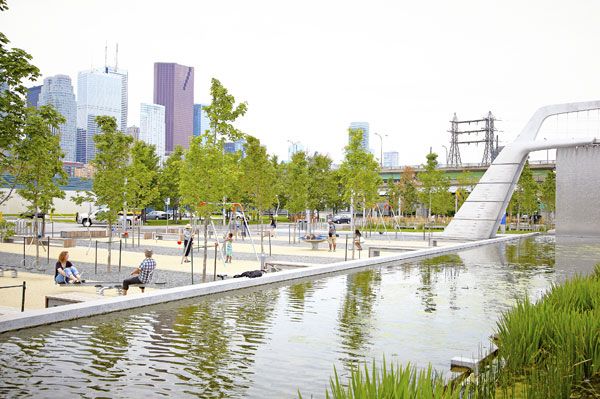
Sherbourne Common Park Sets The Bar High for Sustainable Design
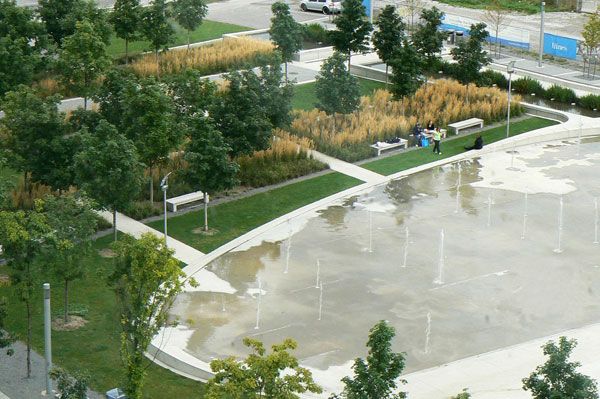
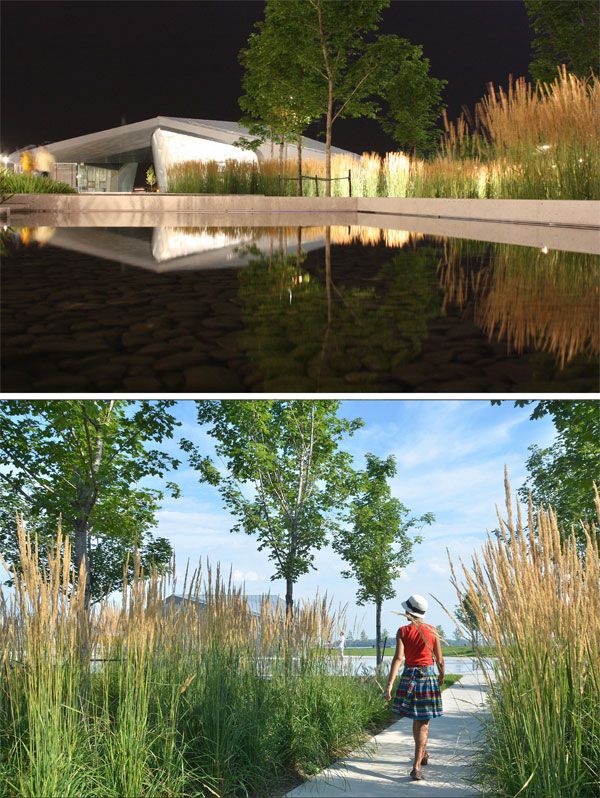
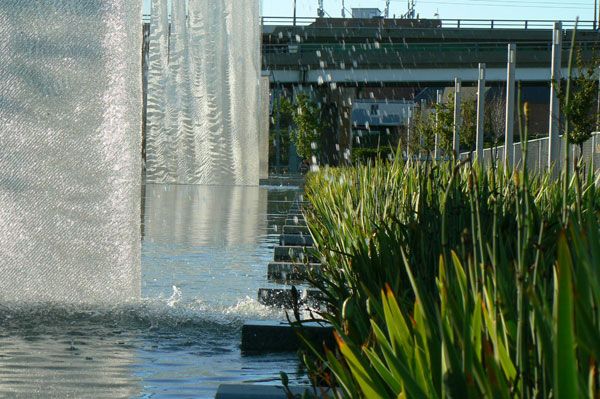
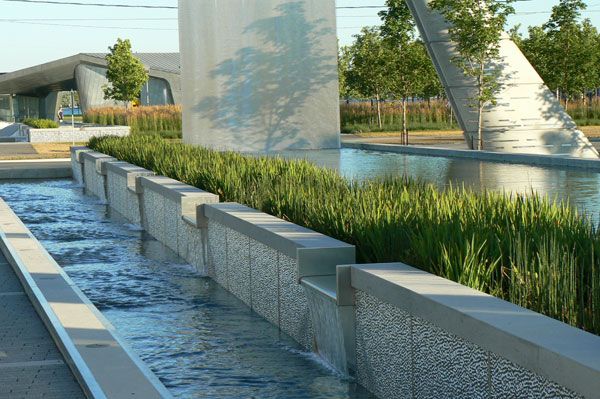
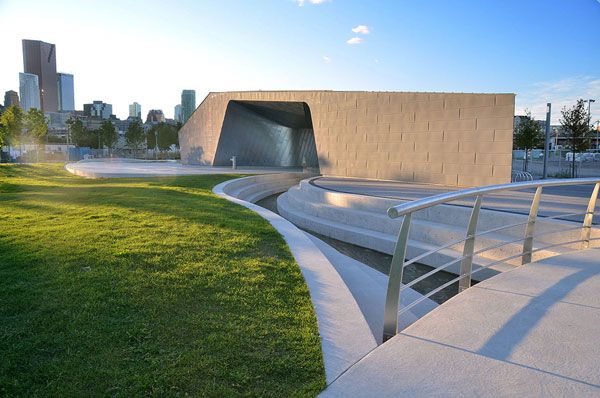
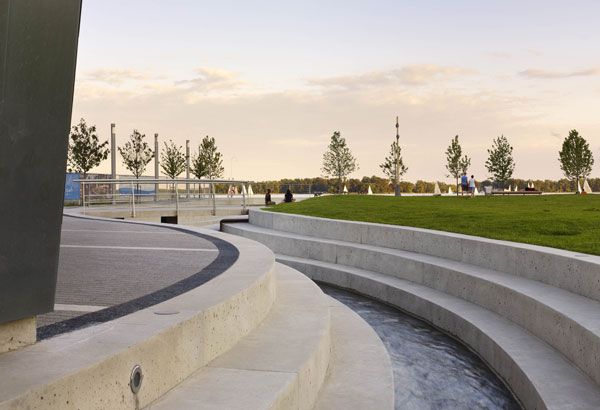
Sherbourne Common Park, by PFS Studio in Toronto, Ontario, Canada. Creating a space that will be functional, innovative, beautiful, and artistic is not easy. Nor is merging the work of professionals from a variety of disciplines, such as architecture, landscape design, civil engineering, and public art. One project where all of this comes together is Sherbourne Common Park in Toronto. This waterfront park in Ontario represents a kind of living room or courtyard for its neighbors. It is a place that is both private and public, with a variety of amenities and something for everyone. It is the first park in Canada to incorporate a neighborhood storm-water management system, and also the first with LEED Gold certification.
Sherbourne Common Park. Photo courtesy of PFS Studio
Sherbourne Common Park. Photo courtesy of PFS Studio
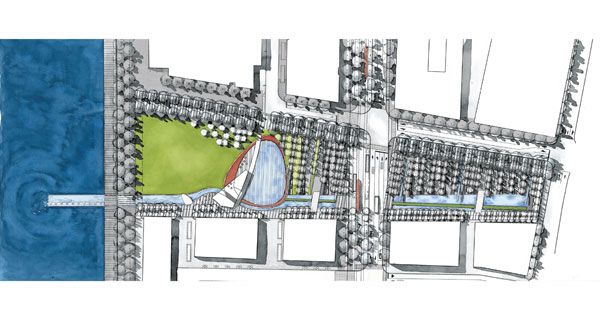
Sherbourne Common Park
The main sections of the park are the open plaza, the children’s play area, the water channel with sculptures, the splash pad/skating rink, the pavilion and the southern open lawn. A promenade and boardwalk are adjacent to the park, making the whole place a destination for recreation and relaxation in an urban environment.

Sherbourne Common Park. Photo credit: © Tom Arban
Sherbourne Common Park. Photo courtesy of PFS Studio

Sherbourne Common Park. Photo credit: © Waterfront Toronto
Sherbourne Common Park. Photo courtesy of PFS Studio
Sherbourne Common Park. Photo courtesy of PFS Studio

Sherbourne Common Park. Photo credit: © Tom Arban
- Understanding the Basic Principles of Organic Design
- Sculptor Creates Major Public Square!
- Stunning Plant Pavilion Created in China

Sherbourne Common Park. Photo courtesy of PFS Studio
Sherbourne Common Park. Photo credit: © Waterfront Toronto
Sherbourne Common Park. Photo courtesy of PFS Studio
Sherbourne Common Park. Image courtesy of PFS Studio

Sherbourne Common Park. Image courtesy of PFS Studio
Recommended Reading:
- Landscape Architecture: An Introduction by Robert Holden
- Landscape Architecture, Fifth Edition: A Manual of Environmental Planning and Design by Barry Starke
Article by Amela Djurakovac

“Walk of the Town”, the Walk Everyones Talking About
Walk of the Town, by T.R.O.P: terrains+open space in Bangkok, Thailand.
Bangkok is the capital city of Thailand, and it is inhabited by 6.5 million people. The population density of Bangkok is 6,450 people per square kilometer. Around 10 percent of the country’s population lives in Bangkok. According to a study, Bangkok has one of the highest motorization rates in Asia, with 388 cars and 220 motorcycles per 1,000 people. Emissions from cars and motorcycles affect the air quality in the city and increase the average temperature, which among other things makes the risk of flood higher. The Walk of the Town project was designed to address these issues. It is located in the Pathum Wan district of Bangkok, an important business district in the city. The project site is between two main stations of rapid transit, where a huge number of people walk daily. But the district has low walkability compared to most of the other areas in Bangkok.

Walk of the Town. Photo courtesy of T.R.O.P: terrains+open space
Walk of the Town
In 2012, Central Pattana Public Company Ltd. asked T.R.O.P to design the landscape of the inner courtyard for their new retail center, Groove, following an idea titled “talk of the town”. Based on the lack of walkable and safe space for pedestrians, a concept called “walk of the town” was proposed instead, to focus more on the space outside the shopping center and improve the landscape quality for pedestrians.

Walk of the Town. Photo courtesy of T.R.O.P: terrains+open space

Walk of the Town. Photo courtesy of T.R.O.P: terrains+open space
- The Garden of Hilton Pattaya by T.R.O.P : terrains + open space
- Where Zen Garden Design Meets Enchanted Woodland: T.R.O.P’s Forest and Pool at Pyne
- Sky Pool Takes World Class Design to the Next Level

Walk of the Town. Photo courtesy of T.R.O.P: terrains+open space

Walk of the Town. Photo courtesy of T.R.O.P: terrains+open space

Walk of the Town. Photo courtesy of T.R.O.P: terrains+open space

Walk of the Town. Photo courtesy of T.R.O.P: terrains+open space

Walk of the Town. Photo courtesy of T.R.O.P: terrains+open space

Walk of the Town. Photo courtesy of T.R.O.P: terrains+open space

Walk of the Town. Photo courtesy of T.R.O.P: terrains+open space
Recommended Reading:
- Landscape Architecture: An Introduction by Robert Holden
- Landscape Architecture, Fifth Edition: A Manual of Environmental Planning and Design by Barry Starke
Article by Jun Yang

Tanner Springs Park, an Oasis in the Middle of the City
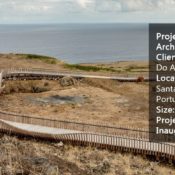
Tanner Springs Park by Atelier Dreiseitl, by Portland, Oregon, USA. Located in the heart of the Pearl District in Portland, Oregon, Tanner Springs park is an oasis in the city providing an escape from the hustle and bustle of city life. This 1-acre park, completed in 2010 by a team of landscape architects and consultants is a model of embracing local ecology and demonstrating sustainable practices. Three of the sides of the sunken park are lined with steps allowing a terraced, permeable edge for visitors to enter, exit, and sit. The east side of the park is lined with an art installation and a boardwalk spanning two blocks which connect Tanner Springs to Jamison Square.

Tanner Springs Park. Photo credit: Dreiseitl
Tanner Springs Park
The programming of the park is a mix of active and passive spaces layered on top of the functional rainwater infiltration and detention wetlands. A portion of the parks paths is raised boardwalks jutting through a pond leading to cobble paths into the planted wetland grasses and a lawn space for activities.

Tanner Springs Park. Photo credit: Dreiseitl

Tanner Springs Park. Image credit: Dreiseitl

Tanner Springs Park. Photo credit: Dreiseitl
- How The Chicago City Hall Green Roof is Greening the Concrete Jungle
- Potsdamer Platz in Berlin Becomes a Sustainable Ecofriendly Urban Square
- How Bishan Park Became “The Central Park” of Singapore

Tanner Springs Park. Photo credit: Scott Downing

Tanner Springs Park. Photo credit: Dreiseitl

Tanner Springs Park. Photo credit: Dreiseitl

Tanner Springs Park. Photo credit: Mike Houck

Tanner Springs Park. Photo credit: Lavalle Linn

Tanner Springs Park. Photo credit: Mike Houck

Tanner Springs Park. Photo credit: GreenWorks

Tanner Springs Park. Photo credit: Dreiseitl

Tanner Springs Park. Photo credit: Dreiseitl

Tanner Springs Park. Photo credit: Dreiseitl

Tanner Springs Park. Photo credit: GreenWorks
Recommended Reading:
- Landscape Architecture: An Introduction by Robert Holden
- Landscape Architecture, Fifth Edition: A Manual of Environmental Planning and Design by Barry Starke
Article by Rachel Kruse

Gardening For The Birds | Book Review
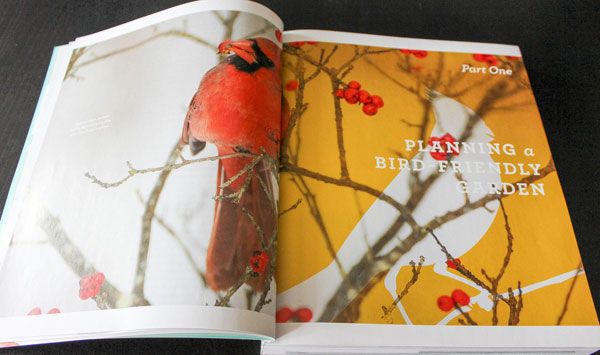
A book review of Gardening For The Birds by George Adams. “How do you turn your yard into an inviting sanctuary, where birds will come to nest, raise their families, and seek shelter for the winter?”- George asks in the first pages of his book “Gardening For The Birds”. From the introduction of this book is a noticeable George Adams’ pedagogical approach. Written with clarity, style, and passion, this book gives us the necessary tools to design and build our own garden that will be able to attract fascinating birds. The book’s content is divided in four parts. In the first two parts, Adams explains the first steps to create or transform your garden into a paradise for birds. Be aware that most of the plants and especially the birds’ species are found in North America. Thus, if you design a garden in North America, all the content of the book is suitable for you, otherwise, if your yard’s site is not in North America, you might still use some information from this book, especially from Part One and Part Two. However, you should consider consulting other books about plants and birds’ species that are appropriate to your region.
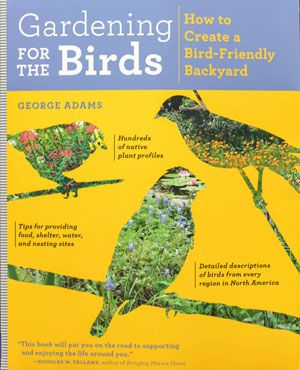
Front cover of Gardening For The Birds. Get it Here!
Gardening For The Birds
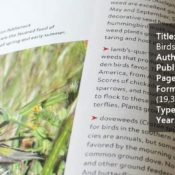
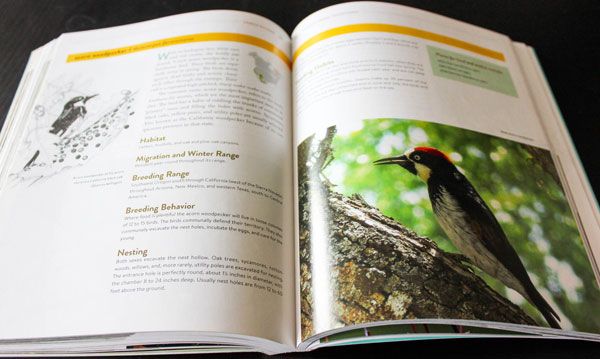
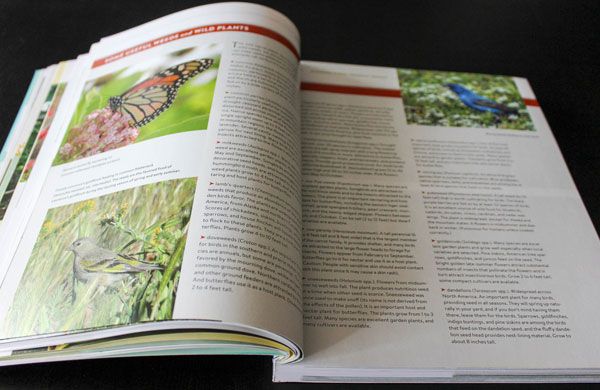
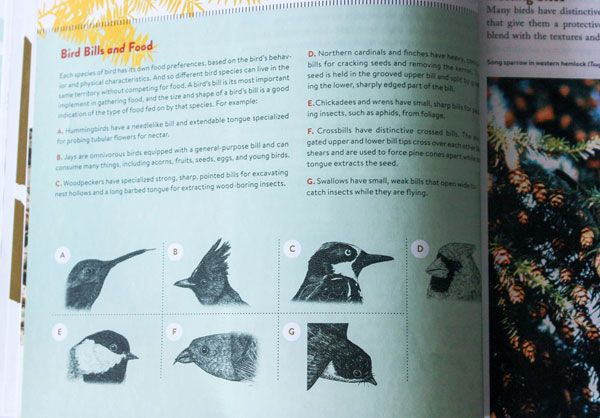
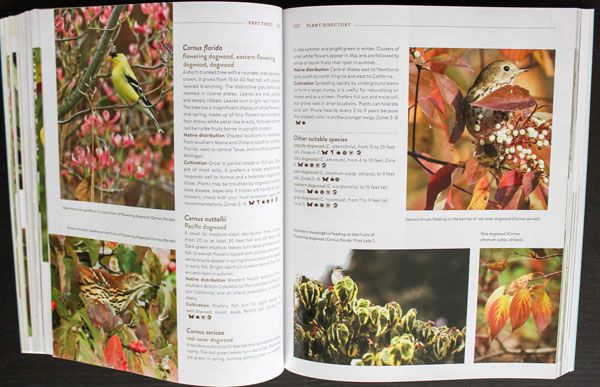
In the first half of Part One, you will find detailed information about some of the birds’ habits regarding food, shelter and nesting sites. Additionally, you will find, all over the book, images and self-explanatory tables and charts that are extremely helpful as a reference guide. For instance, one of these charts illustrates seven types of bills of birds together with their corresponding food preferences. All bird-feeding examples given by Adams are examples in which birds are able to get their food from the plants, and there is no example in which the author references any supplemental bird-feeding method. Hummingbirds in Your Garden In the second half of Part One, you will have access to information about hummingbirds, one of the most beautiful birds in nature, and about butterflies, one of the insects, oftentimes desired in a garden. Adams offers us, in this part, a very helpful chart about some of hummingbirds’ and butterfly’s habits. This chart is organized by plants listed alphabetically by botanic name; for each plant, you will find information related to flower color, light needed for cultivation, estimated flowering months, hardiness zones, approximate mature height and how it could attract birds and butterflies.
Inside Gardening For The Birds. Photo credit: Sarah Suassuna
Part 1 of Gardening For The Birds. Photo credit: Sarah Suassuna
Inside Gardening For The Birds. Photo credit: Sarah Suassuna
Inside Gardening For The Birds. Photo credit: Sarah Suassuna
Inside Gardening For The Birds. Photo credit: Sarah Suassuna
Pick up your copy of Gardening For The Birds today!
Article by Sarah Suassuna Return to Homepage


Hornsbergs Strandpark, a Modern Wonder of Landscape Architecture
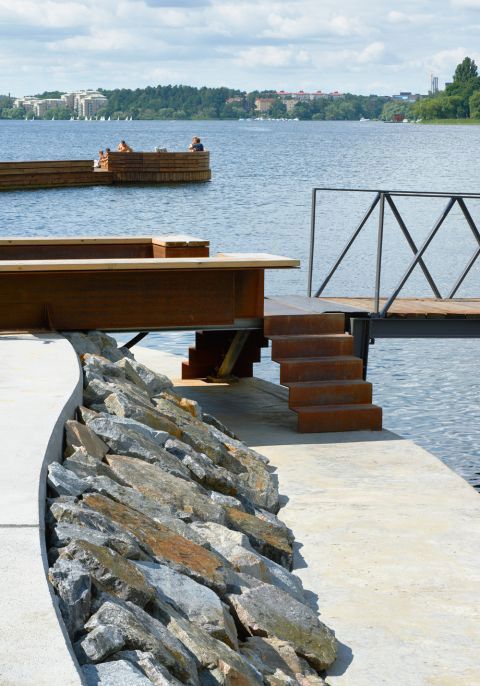
Hornsbergs Strandpark, by Nyréns Architects, in Kungsholmen, Stockholm, Sweden. People from all over the world still speak about the wonders of the ancient world, appreciating the talent and skills of those who made them possible. However, as we return to the present, it is impossible not to notice how landscape architecture, through its amazing creativity and vision, leads to the appearance of modern wonders. One such project is Hornsbergs Strandpark, a project that was commissioned by Stockholms stad Exploateringskontoret. Completed between 2008 and 2012, this one-of-a-kind park had an approximate cost of construction of 107 million SEK (approx 127 million USD) and covers an area of over 700m long, being organized into four different parts. However, it was worth it in the end and the talent of the team that created it was recognized officially, as the project received Sienapriest, a prestigious Swedish landscape award in 2012.
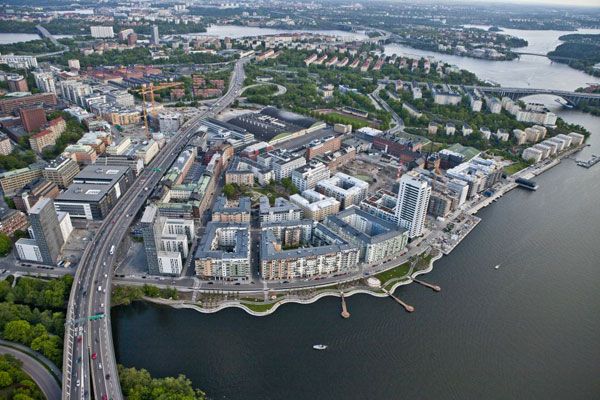
Hornsbergs Strandpark. Photo credit: Ăke E: son Lindman, Lennart Johansson
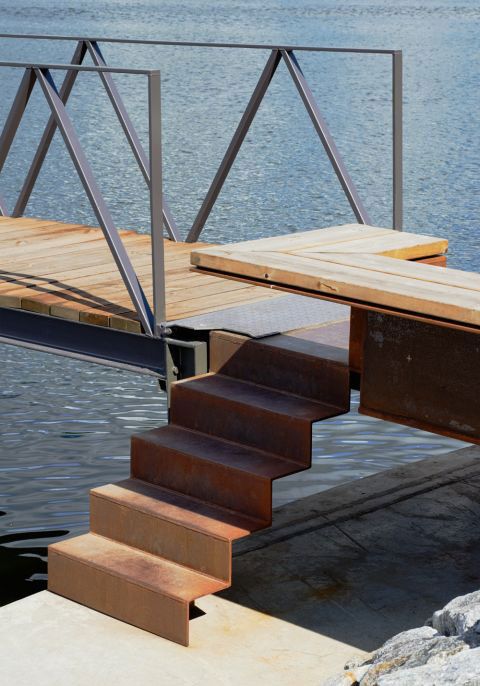
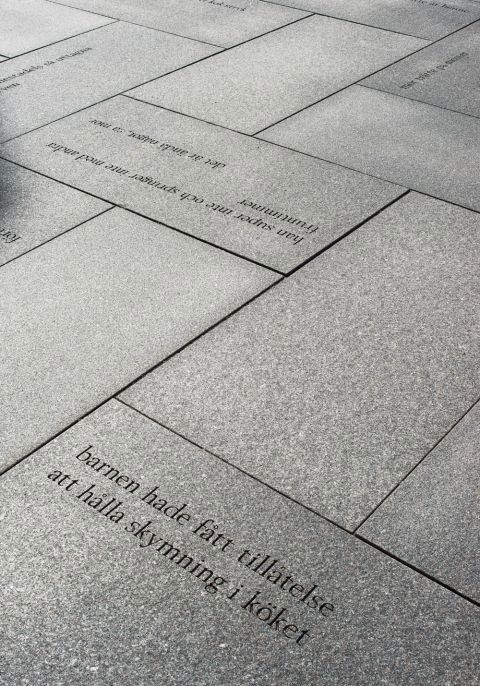
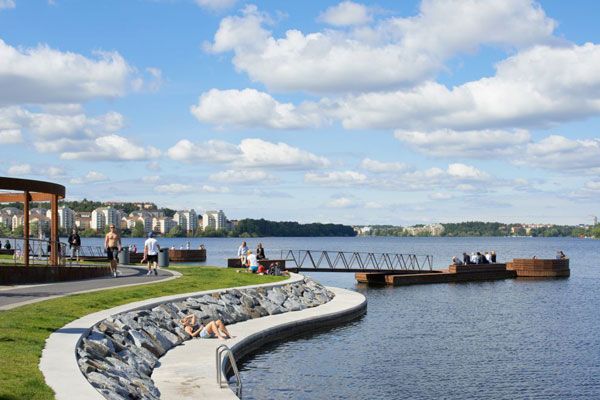
Hornsbergs Strandpark
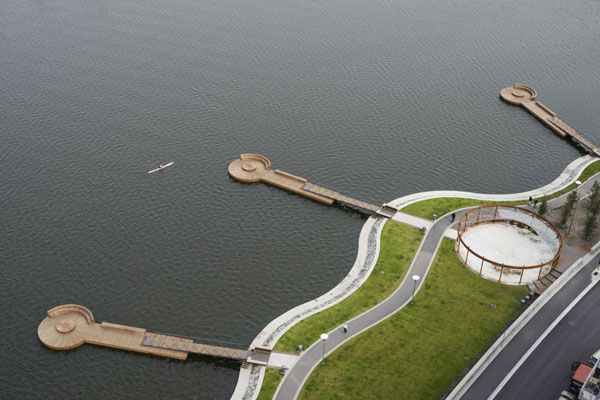
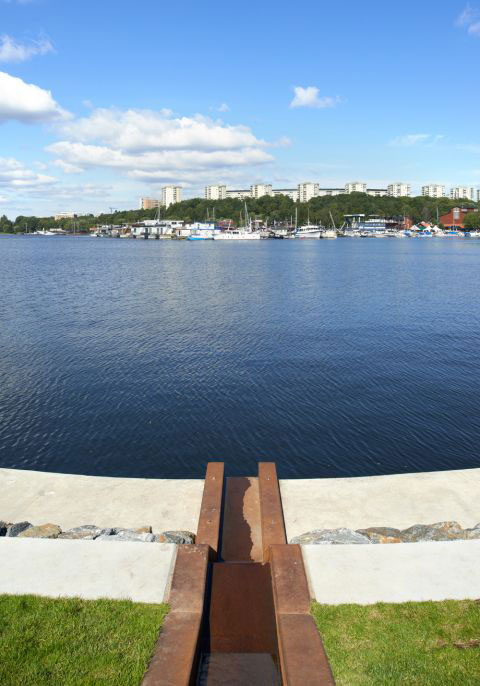
Hornsbergs Strandpark is located on an island in Lake Mäleren, known as Kungsholmen, which is part of Stockholm. In deciding on the way, the park will turn out, the landscape architects working on the project have made avail of its perfect location. Thus, the park faces to the west Ulvsundasjön (fishing bay) and the beautiful evening sun. To the east, there is Kajparterren, an area that appears in a perfect contrast with the organic park. Water and Land Brought Together in an Amazing Project An aerial view is the best way to discover Hornsbergs Strandpark and all of the elements that it contains. Even at a first glance, one can easily notice how water and land were brought together for this amazing project, with the curvy shoreline representing a definite point of attraction.
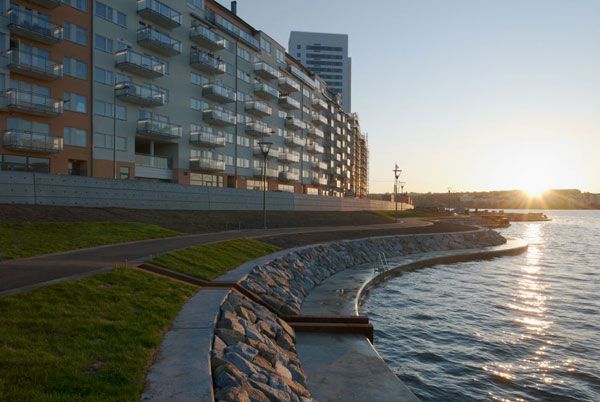
Hornsbergs Strandpark. Photo credit: Ăke E: son Lindman, Lennart Johansson
- Understanding the Basic Principles of Organic Design
- Sculptor Creates Major Public Square!
- Stunning Plant Pavilion Created in China
Hornsbergs Strandpark. Photo credit: Ăke E: son Lindman, Lennart Johansson
Hornsbergs Strandpark. Photo credit: Ăke E: son Lindman, Lennart Johansson
Hornsbergs Strandpark. Photo credit: Ăke E: son Lindman, Lennart Johansson

Hornsbergs Strandpark. Photo credit: Ăke E: son Lindman, Lennart Johansson
Hornsbergs Strandpark. Photo credit: Ăke E: son Lindman, Lennart Johansson
Hornsbergs Strandpark. Photo credit: Ăke E: son Lindman, Lennart Johansson
Hornsbergs Strandpark. Photo credit: Ăke E: son Lindman, Lennart Johansson
Recommended Reading:
- Landscape Architecture: An Introduction by Robert Holden
- Landscape Architecture, Fifth Edition: A Manual of Environmental Planning and Design by Barry Starke
Article written by Alexandra Antipa