Article by Bilal Sajjad Raised garden beds aka garden boxes are perfect to plant small plots of vegetables or flowers. Before you learn how to build these garden boxes, let me share their advantages:
- They prevent soil compaction.
- They provide good drainage for water.
- They protect the plants from slugs and snails.
- The sides of the boxes keep the soil from eroding when it rains.
- They are easier to tend, freeing you any back strain.
- They Keep the Plants Away From Pathway Weeds
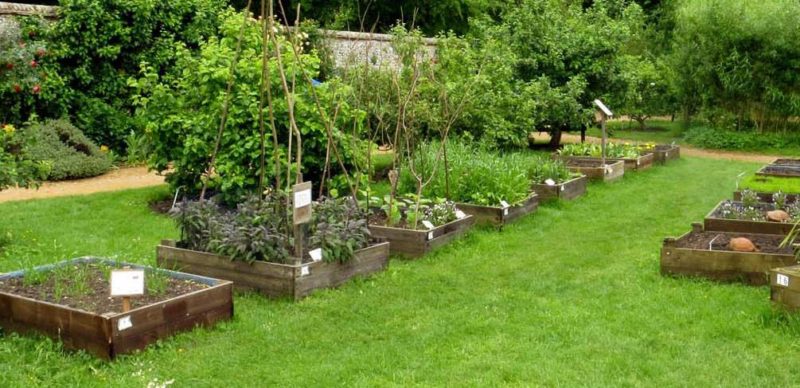
Raised Garden Beds
How to build Raised Garden Beds?
To build raised garden beds, you need some tools and materials. Here’s the list: 1. Lumber 2. Fastenings (Screws, nails, stainless screws) 3. Cross supports (Aluminum flat stock) 4. Hand saw 5. Square 6. Carpenter’s level 7. Mallet or sledge 8. Screwdriver 9. Hack saw 10. Drill WATCH >>> How to Build a Raised Garden Bed with Wood – Easy (EZ) & Cheap
After you gather the above tools and materials, follow the steps given below to start building your own raised garden beds: 1. Cut and build the basic frame: Clear the area where you want to place the garden bed. Decide how long you want it to be and mark the ends of the wooden plank. Cut it with a saw. Use two screws to hold the planks in place. Select the level for the raised garden beds and put blocks underneath it to keep the level.
2. Screw boards into the corner posts:
When cutting the posts, keep them longer than your actual need. Saw a point on the bottom of the posts. Arrange the first post in the corner of the wooden frame. Insert the post a few inches deep into the ground. Use two screws per side to attach the frame to the post. Do the same with the other posts and screw them similarly.
3. Insert the boards to the ground:
To add the bottom row of boards to the ground level, use the same method of screwing into the posts. To fit the boards in place, push them into the ground. Now, cut the posts that are sticking up using a saw. Now that they are flush to both sides of the bed, smoothen the ground in the pathway and fill the raised garden bed with soil.
4. Add cross bracing:
If you want your raised garden beds to be longer than 8 feet and taller than 18 inches, it is wise to use cross bracings. This way you can prevent the garden beds from bowing outwards in the center. Take an aluminum flat stock and cut it to a width equal to that of your garden bed using a hacksaw. Using a drill machine, make holes on each end of the stock and attach the cross brace to either side of the posts with 1 inch stainless screws.
5. Top with soil. Start gardening!!
Collect the best soil from your garden to fill your raised garden beds. Screen the soil through a half inch mesh if it contains rocks and stones. If you don’t have a mesh, you can do so with your hands too, only it will take more effort. Add different soil amendments like lime, organic fertilizers, peat and rock phosphate to improve the fertility of the soil as required. Shower the soil with a fine spray and then top with more soil, because the soil level lowers a bit owing to water. Done!! Your raised garden beds are ready for gardening. Apart from raised garden beds, if you want to beautify your garden yourself, you can check out these amazing garden shed ideas too.
WATCH >>> How to Build a Raised Garden Bed for Under $15!
Recommended Reading:
- Becoming an Urban Planner: A Guide to Careers in Planning and Urban Design by Michael Bayer
- Sustainable Urbanism: Urban Design With Nature by Douglas Farrs
Article by Bilal Sajjad Featured image: © Copyright Steve Daniels and licensed for reuse under this Creative Commons Licence
Published in Blog