


This week we are again building off of the pattern made in the water tutorial, this time to make a wetland. Wetlands are one of the trickiest things to render well in plan, in my opinion, as traditional means force you to render what looks like an open prairie field, or a lake. This type of situation, where hand graphic techniques do not allow for semi-transparency or small scale detail, at least not without a prohibitive time investment, is when Photoshop rendering can really shine. Before you can make your wetland, you will need to make a pattern for a field.
NATURAL FIELD
Step 1: Find a field
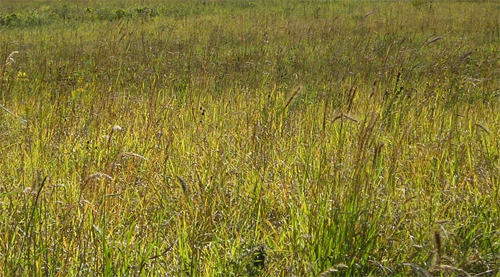
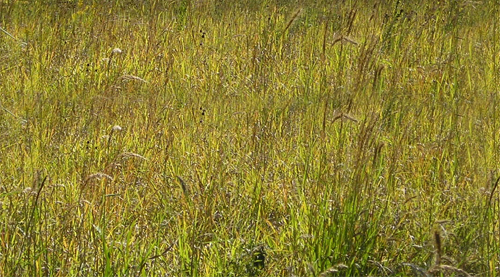
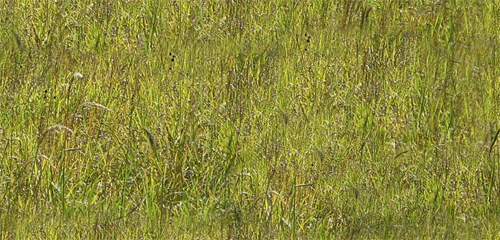
First things first: find a photo of a field of grass, a prairie, or a wetland. The best picture will be one with some regular variation to it, and that is taken from as high as possible, to create less issues with perspective correction. Optimally, you go out somewhere, and take one yourself, so you know exactly what you get, but for our purposes, I headed back to Google, where I found this gem:
http://dnr.state.il.us/lands/Landmgt/PARKS/R2/JPP/images/JPP_EastWetlandPanorama6_JPG.jpg
I then trimmed it down to this:
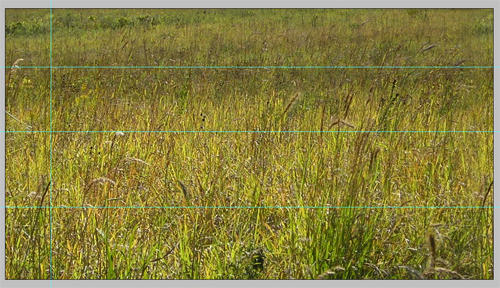
Step 2: Start Making a Pattern
With this particular image, more work is needed to make it into a pattern that won’t be obviously a repeating image.
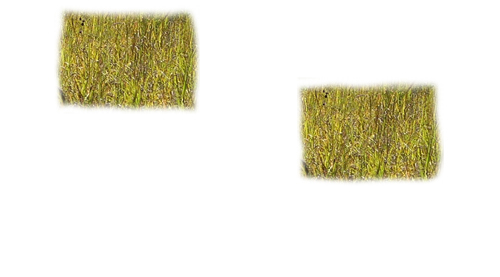
First take the left side, as you did to make the water pattern, pull it to the right, erase the inside edge to blur it:

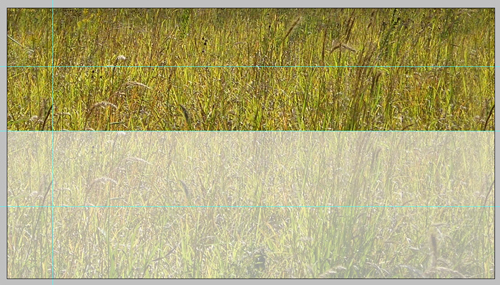
After placing the right side, you’ll notice a problem with this image:
Step 3: Fix the Dark Areas
Above the second line you can see that the grass gets much darker, so to resolve this, copy the area between the middle two sections, and drag it to the top of the image:
Then, as you did with the right edge, erase the top edge of the base layer, getting rid of the dark portion of grass:
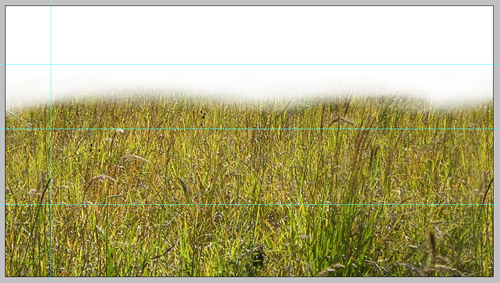
Move the base layer (That you erased some of in the last step) to the top, and merge it with the top portion you copied earlier:
Step 4: Hide the Repeating Areas
Now, while the drawing looks pretty good, you can see where the repeating pattern of the duplicated white flower (on the left) and the dark chevron shaped seed heads (on the right) might create a very obvious seam look. To hide these, select an area in the middle of the pattern that is regular, and copy paste it over the problem areas, and blur the edges:
Merge all the layers, copy the top to the bottom and fade it (as you did with the left side). The last problem area is with the tuft of dark grass on the lower right. Use the heal brush to copy from a few other areas over the top of the grass:
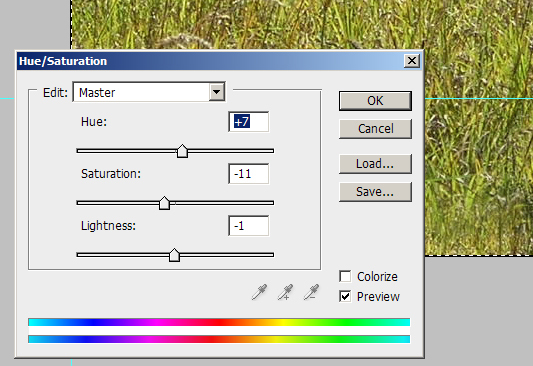
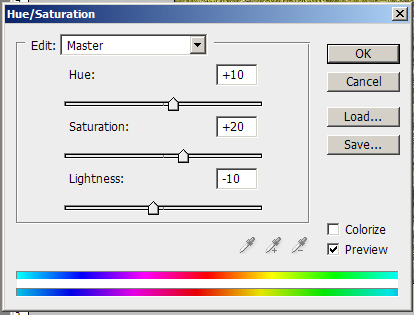
Step 5: Fix the Color
Last, the grass is a little over saturated and yellow for a wetland, so tweak the hue/saturation to a little more green, and a little less saturated:
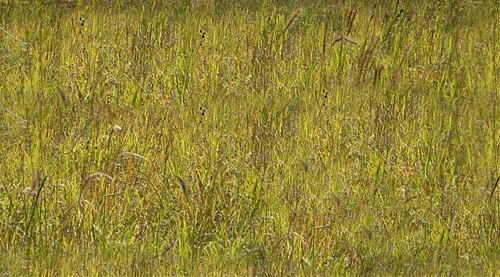
That gives you this pattern for fields, or for your wetland’s base:
WETLAND
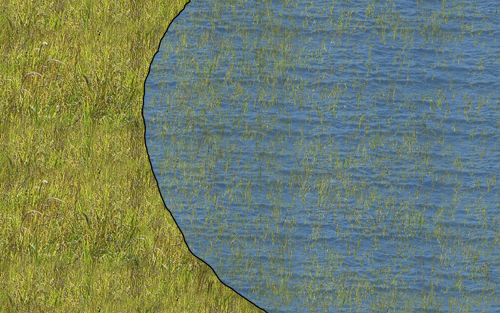
Step 1: Don’t Stay Between The Lines
For this example I am drawing a wetland that boarders a prairie. (Prairie on the left, Wetland on the right) Start by painting both areas with the prairie pattern:

Step 2: Flood the Wetland
Now select the area to the right of the line. Because the line will not be perfectly hard, go to Select>Modify>Expand and expand the selection area by around 1/2 of the width of the line. (For this example, it was around 2 pixels)

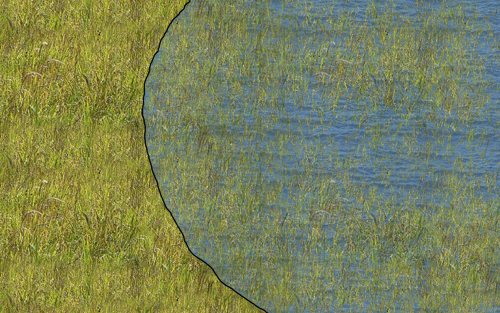
Step 3: Done! Wait… No You’re Not!
This is about where most wetland renderings stop, and why I have never liked most of them. Unless this is a wetland that I can water ski in, it should not look like that. Select the eraser, and set it to something similar to these settings. The keys are the size, opacity, angle jitter, size jitter, scatter, and count- as these will create the spread to get a lose, open spray of grass. The exact numbers you will use will vary based on the side of your rendering- my full size is about 1680 x 1050.

Step 4: Put Down a Base Layer
Now spray back and forth a bit over your water layer, creating holes through which the field can be seen. Don’t release the mouse during this first layer, as that will erase areas of overlap by more then the 60% you have it set for.
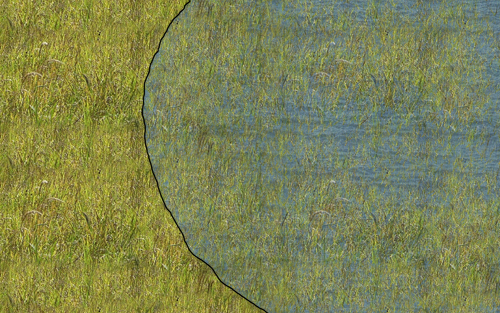
Step 5: Add Some Character
Go Back over the area, and delete high elevation areas more, and create some interest by erasing small areas more to create small planting islands, and even small bridges between the islands.

Step 6: Finishing Touches
That leaves you with a wetland that looks like this:
Its still much better then standard wetland renderings are, but there is room for improvement. First, make the water semi transparent, say to around 80% opacity. This makes it so you can see some subtle grass through the areas that are still solid water.
This makes the water color lose a little to much of its power though, so I then up the hue and saturation on the water layer.

This is almost right, but there is now a tad too much water texture strength at the edge of the wetland. Run your eraser brush over this area a time or two if you need it, and do any other minor touch ups you feel are needed, and you are set!

If the wetland you are rendering is not part of your design, but an existing condition, you may want to do it without any hard line, as it will create a gentle transition, and wetlands are naturally fairly nebulous in their edge conditions.


Kevin J. Gaughan
Another excellent tutorial!
Evangeline P. Bontilao
thank you for this….it is such a help…