An AutoCAD tutorial on how to prepare your AutoCAD file for SketchUp in just a few seconds from our resident AutoCAD expert UrbanLISP. As Kevin J. Pfeiffer has explained previously, AutoCAD drawings of your projects are good bases to build 3d models in SketchUp. Every CAD program has its benefits but sure enough also its downsides. In addition to Kevin’s article “How to Make Quick 3D Models From AutoCAD to SketchUp”, let’s have a closer look at those downsides and more importantly how to prepare your AutoCAD drawing for SketchUp.
Linear Entities
The drawing Kevin imported in his article is a simple plaza design made up only of linear entities. If that’s the level of drawing you want to import you might want to consider setting it up in SketchUp from the start. It’s more likely, however, that your AutoCAD drawing is developed a bit further. But let’s start with a drawing with only linear entities like Kevin’s. In the image below you see a screen shot of SketchUp. There are two similar shapes, both created in AutoCAD. The lower shape is a closed polyline. The upper shape consists of two arcs and two lines; the polyline after exploding it. See these AutoCAD tutorials:
- 4 AutoCAD Commands to Draw Paving Patterns on Curving Paths
- How to Show Topography in your Plan Drawing in AutoCAD
- How to Place Large Quantities of Trees in a Master Plan Instantly with AutoCAD
Let’s assume we have SketchUp Pro available, as only the Pro version will import files from AutoCAD. Since going out for dinner to a proper restaurant is often already too expensive for students, licensed software may not be in your budget if you are one. If you or your boss, do have a budget available for SketchUp Pro, you should realize the price of SketchUp Pro is only a fraction of any AutoCAD version, so the assumption of having SketchUp Pro available isn’t a long shot. When we import our CAD file into SketchUp Pro, we’ll see it’s still only linear. This tells us it doesn’t matter how we import the shape in SketchUp, we still need to make it into a surface. We do this for both shapes in our example and then extrude them with the push/pull function. Now this is where we see something odd happening.
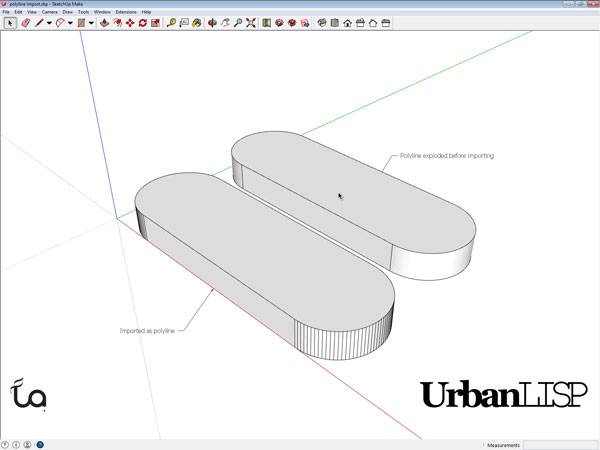
Extruding with SketchUp. Printscreen via Rob Koningen
Chewing Gum
Working in SketchUp might be considered to be like working with chewing gum. Let’s say we import an AutoCAD drawing that is a bit further developed than Kevin’s plaza design into SketchUp. In this imaginary urban plan the plots are an important feature of our plan. In AutoCAD the plots are closed polylines and define areas. They are drawn on a designated layer. SketchUp fortunately also allows us to work with layers, very important as explained in the article “10 Must do’s to Become a Professional AutoCAD User”. When we check the layers in SketchUp we see that it adopted the layers we created in AutoCAD. Phew, that saved us some time! Now let’s turn off all layers except our plot layer. Huh? Where did our plots go? We can see some of it, but where’s the rest? As we can read at point 8 in Kevin’s “Top 10 Hints & Tips For SketchUp” we can select every connected entity by clicking an entity three times. When we do this we see a lot more than our remaining plots highlighted.

The plots in AutoCAD. Printscreen via Rob Koningen
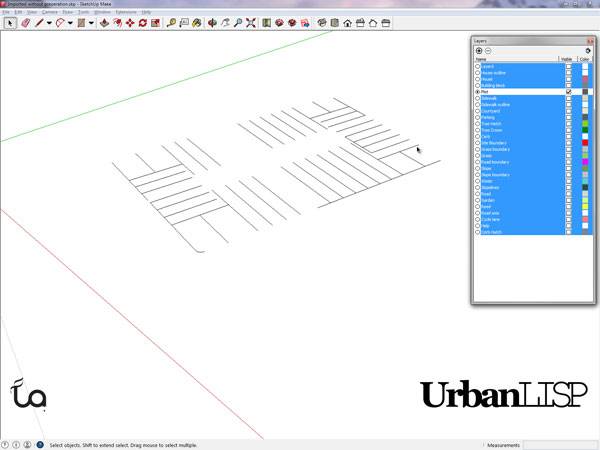
The plots in SketchUp. Printscreen via Rob Koningen
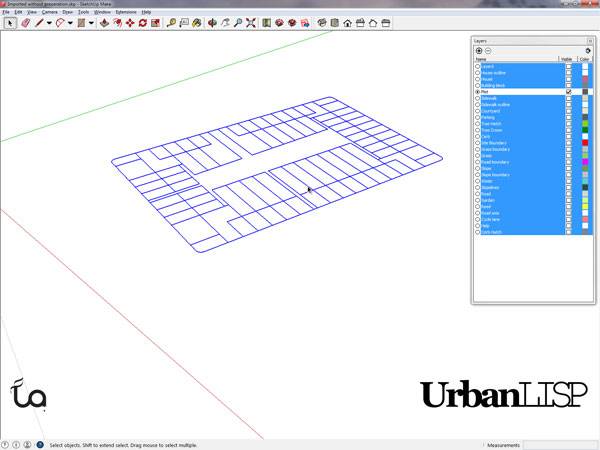
After clicking the plots three times. Printscreen via Rob Koningen
Isn’t something missing?
When we have another look at our imported drawing we see layers created and used for hatches in AutoCAD. But where did those hatches go? Well, they’re gone, as are your External References, by the way. The conclusion here – we don’t need those hatch layers so we can throw them out. Another additional action we have to do in addition to exploding our polylines and importing our layers one by one. Is there any time left for doing the actual design part? Probably not when you realize you also need to clear your blocks of useless hatches. Argh! Can you hear them too – those CAD opponents gearing up to bash the usage of CAD software? With all these issues you might consider joining them. Well, wait just a moment.
A Solution
The list of issues above was created over years of developing multi-layered masterplans and importing them into Sketch Up, working with models designed by colleagues that didn’t consider these issues and resulting in many frustrating hours of cleaning up the file. Of course our CAD programs are packed with useful tools but sometimes seem to lack the essential ones. As mentioned in the article “10 Must do’s to Become a Professional AutoCAD User” the usage of apps is essential to become a professional. Help the software you use help you. In this case you might want to check out the UrbanLISP command “Prepare for SketchUp”. Once you’ve loaded it into AutoCAD, all you have to do is type P-S-U and confirm you in fact want to do this. Please remember to save your AutoCAD file as a file to be imported and leave your original CAD drawing untouched; you don’t want to lose that information. Depending on the size of your drawing the command will run for up to ten seconds. It will give you time to take a sip of your coffee or look outside for a moment. Meanwhile, the command will do the following:
- It erases all layouts, you don’t need them in SketchUp anyway and they might contain layers or blocks that are not in the model space, that part that actually is imported into SketchUp.
- It detaches all xrefs, they will not be imported anyway.
- Same story for the hatches, they’re kicked out.
- Also any hatches are removed from your blocks.
- It explodes all polylines.
- It places all entities on the same layer in a block. Both AutoCAD and SketchUp work with groups but AutoCAD groups unfortunately aren’t considered as such by SketchUp. Blocks work in both programs, however. The new block will be a part of its own layer. Existing blocks will be excluded; they are already blocks.
- It purges the drawing; with the removal of all the useless entities listed above, you are bound to have some empty layers or blocks that aren’t used.
- It performs a regen as a conclusion. When the command is done, save the file and import it into SketchUp. The drawing will have strictly separated layers, beautiful round curves and you will have a clean file with only the layers that are in use.
The plots in SketchUp. Printscreen via Rob Koningen
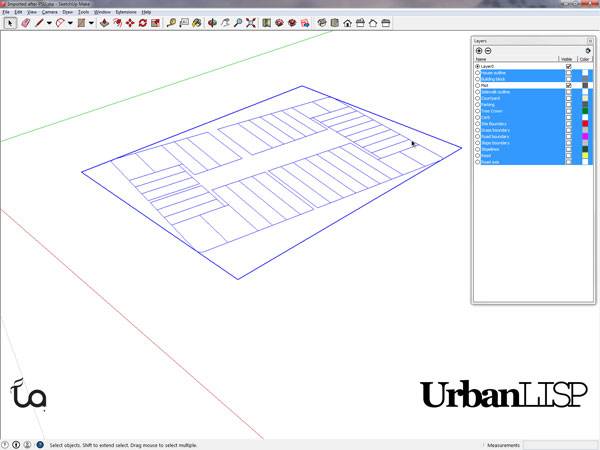
The plots are complete in SketchUp due to the ‘Prepare for SketchUp’ command. Printscreen via Rob Koningen
Recommended Reading:
- Digital Drawing for Landscape Architecture by Bradley Cantrell
- Detail in Contemporary Landscape Architecture by Virginia McLeod
Article by Rob Koningen
You can see more of Rob’s work at UrbanLISP
Published in Blog